Single storey extension
-
![Site survey]()
Site Survey
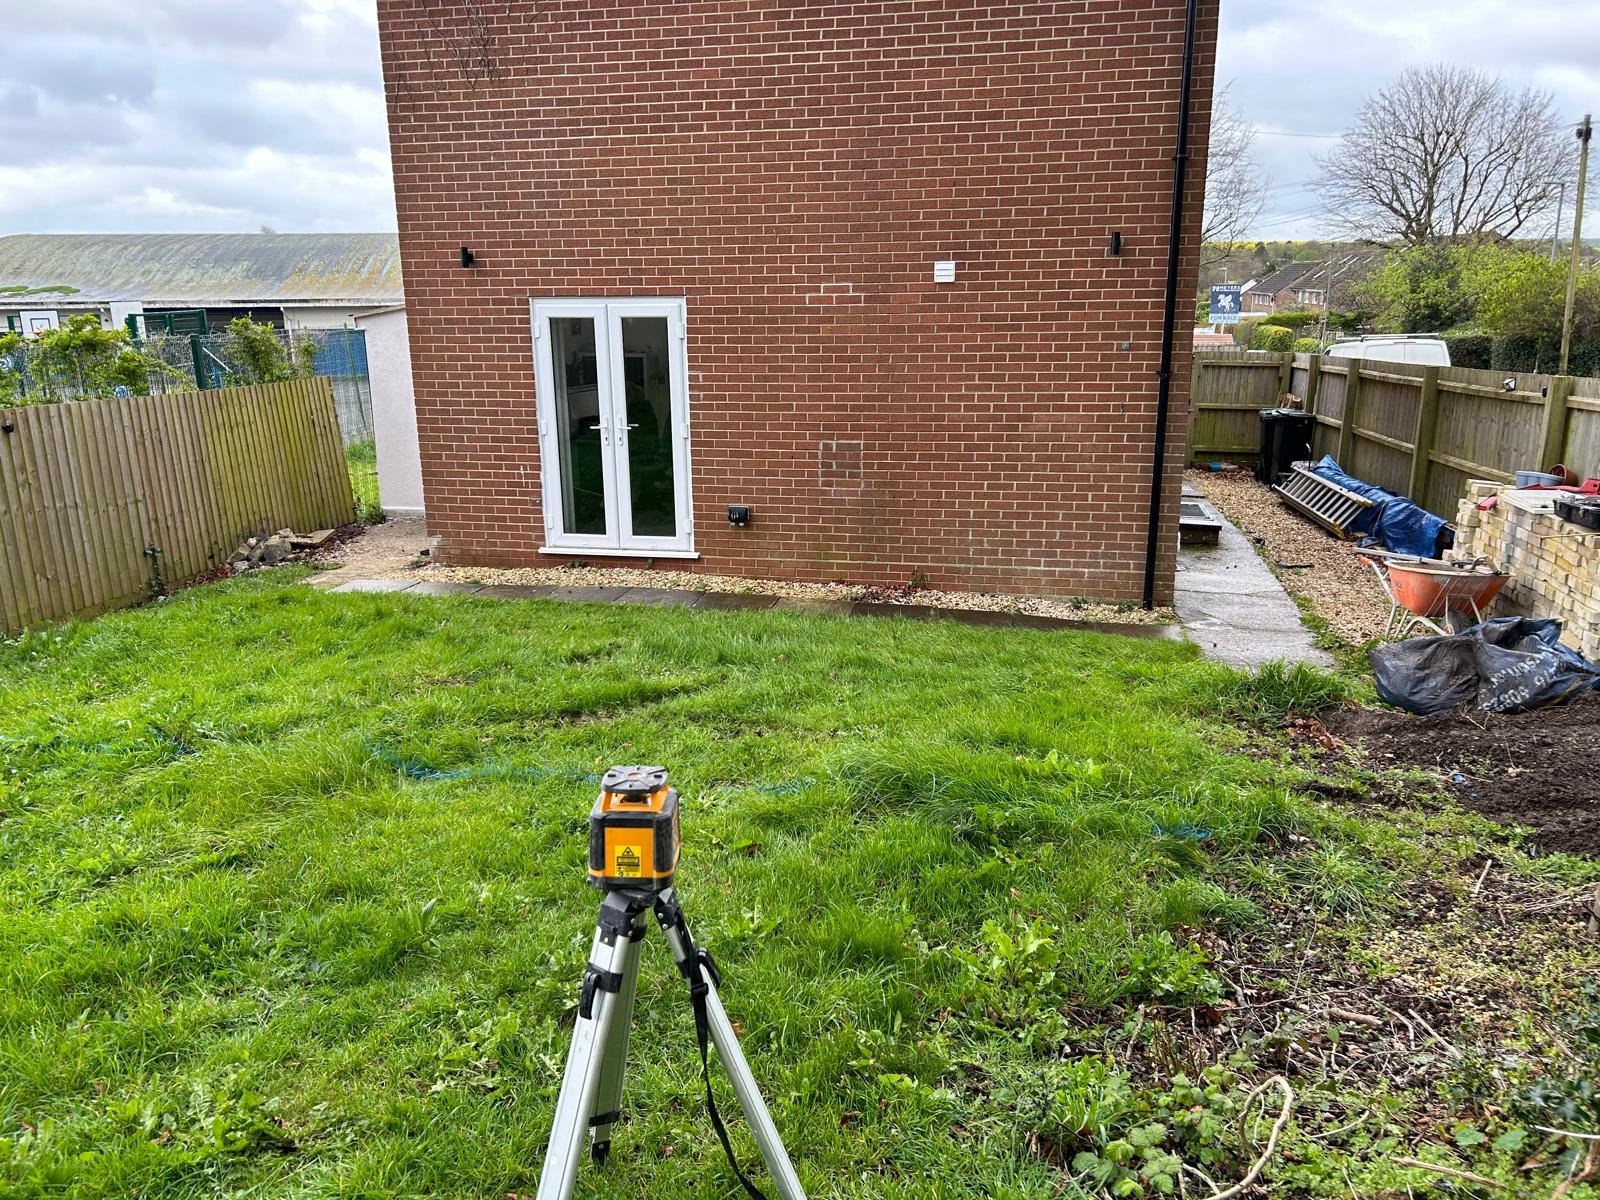
A site assessment and level survey are crucial steps in planning a single-story extension. During the site assessment, the existing conditions are evaluated, including the property boundaries, ground stability, drainage, access points, and any potential obstacles like trees or utility lines. Taking levels involves measuring the ground's contours and elevations to ensure the extension is designed to match or integrate seamlessly with the existing structure. This process helps identify any need for grading or adjustments to maintain proper drainage and structural stability. Accurate site assessment and leveling are essential for compliance with building regulations and to avoid costly issues during construction.
-
![]()
Footings and ground works
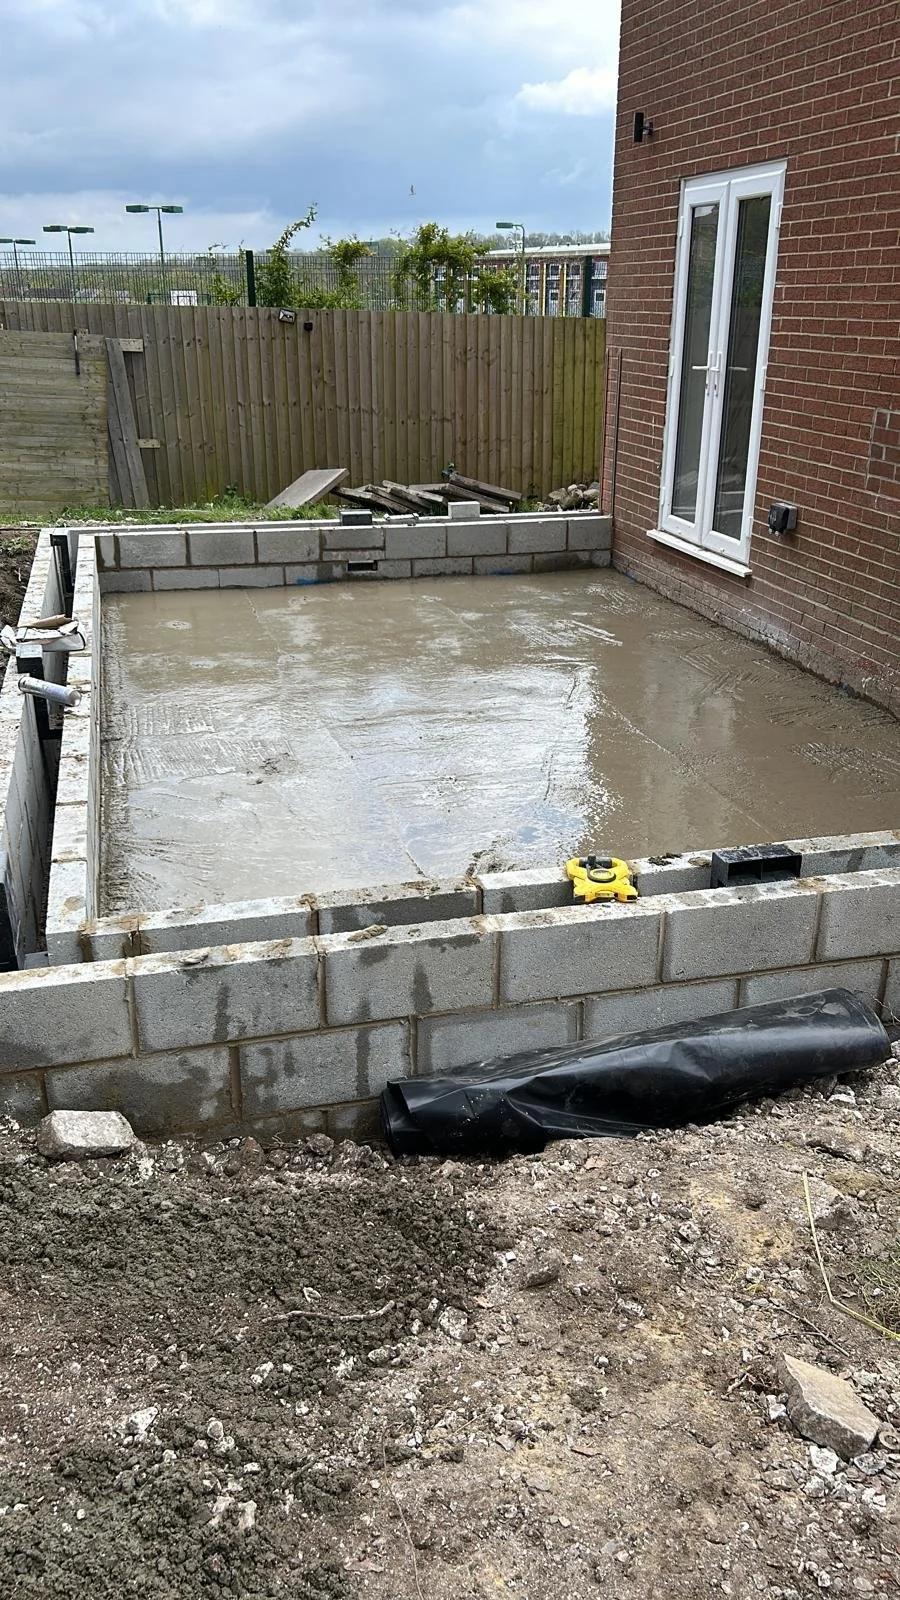
Footings and groundworks are the foundation of a single-story extension, providing the structural base needed to support the new build. The footings are typically trenches filled with reinforced concrete, dug to a depth that ensures stability and protects against ground movement or frost heave. The depth and width of the footings depend on soil conditions, load requirements, and local building regulations. Groundworks include site preparation, excavation, and ensuring proper drainage systems are in place to prevent water accumulation near the foundation. Completing these steps accurately is vital to ensure the extension remains stable, safe, and durable over time.
-
![]()
Block built extension
Block building for a single-story extension involves constructing the walls using concrete or lightweight blocks, which provide strength, durability, and thermal insulation. The process begins with laying the first course of blocks on a damp-proof course (DPC) to prevent moisture from rising through the structure. Blocks are laid in a staggered pattern, bonded with mortar to create stability and uniformity. Openings for windows and doors are reinforced with lintels or beams to distribute loads effectively. Accurate alignment and leveling are crucial throughout the build to ensure the walls are plumb and comply with building regulations. Once complete, the blockwork provides a robust framework for finishes such as rendering, plastering, or cladding.
-
![]()
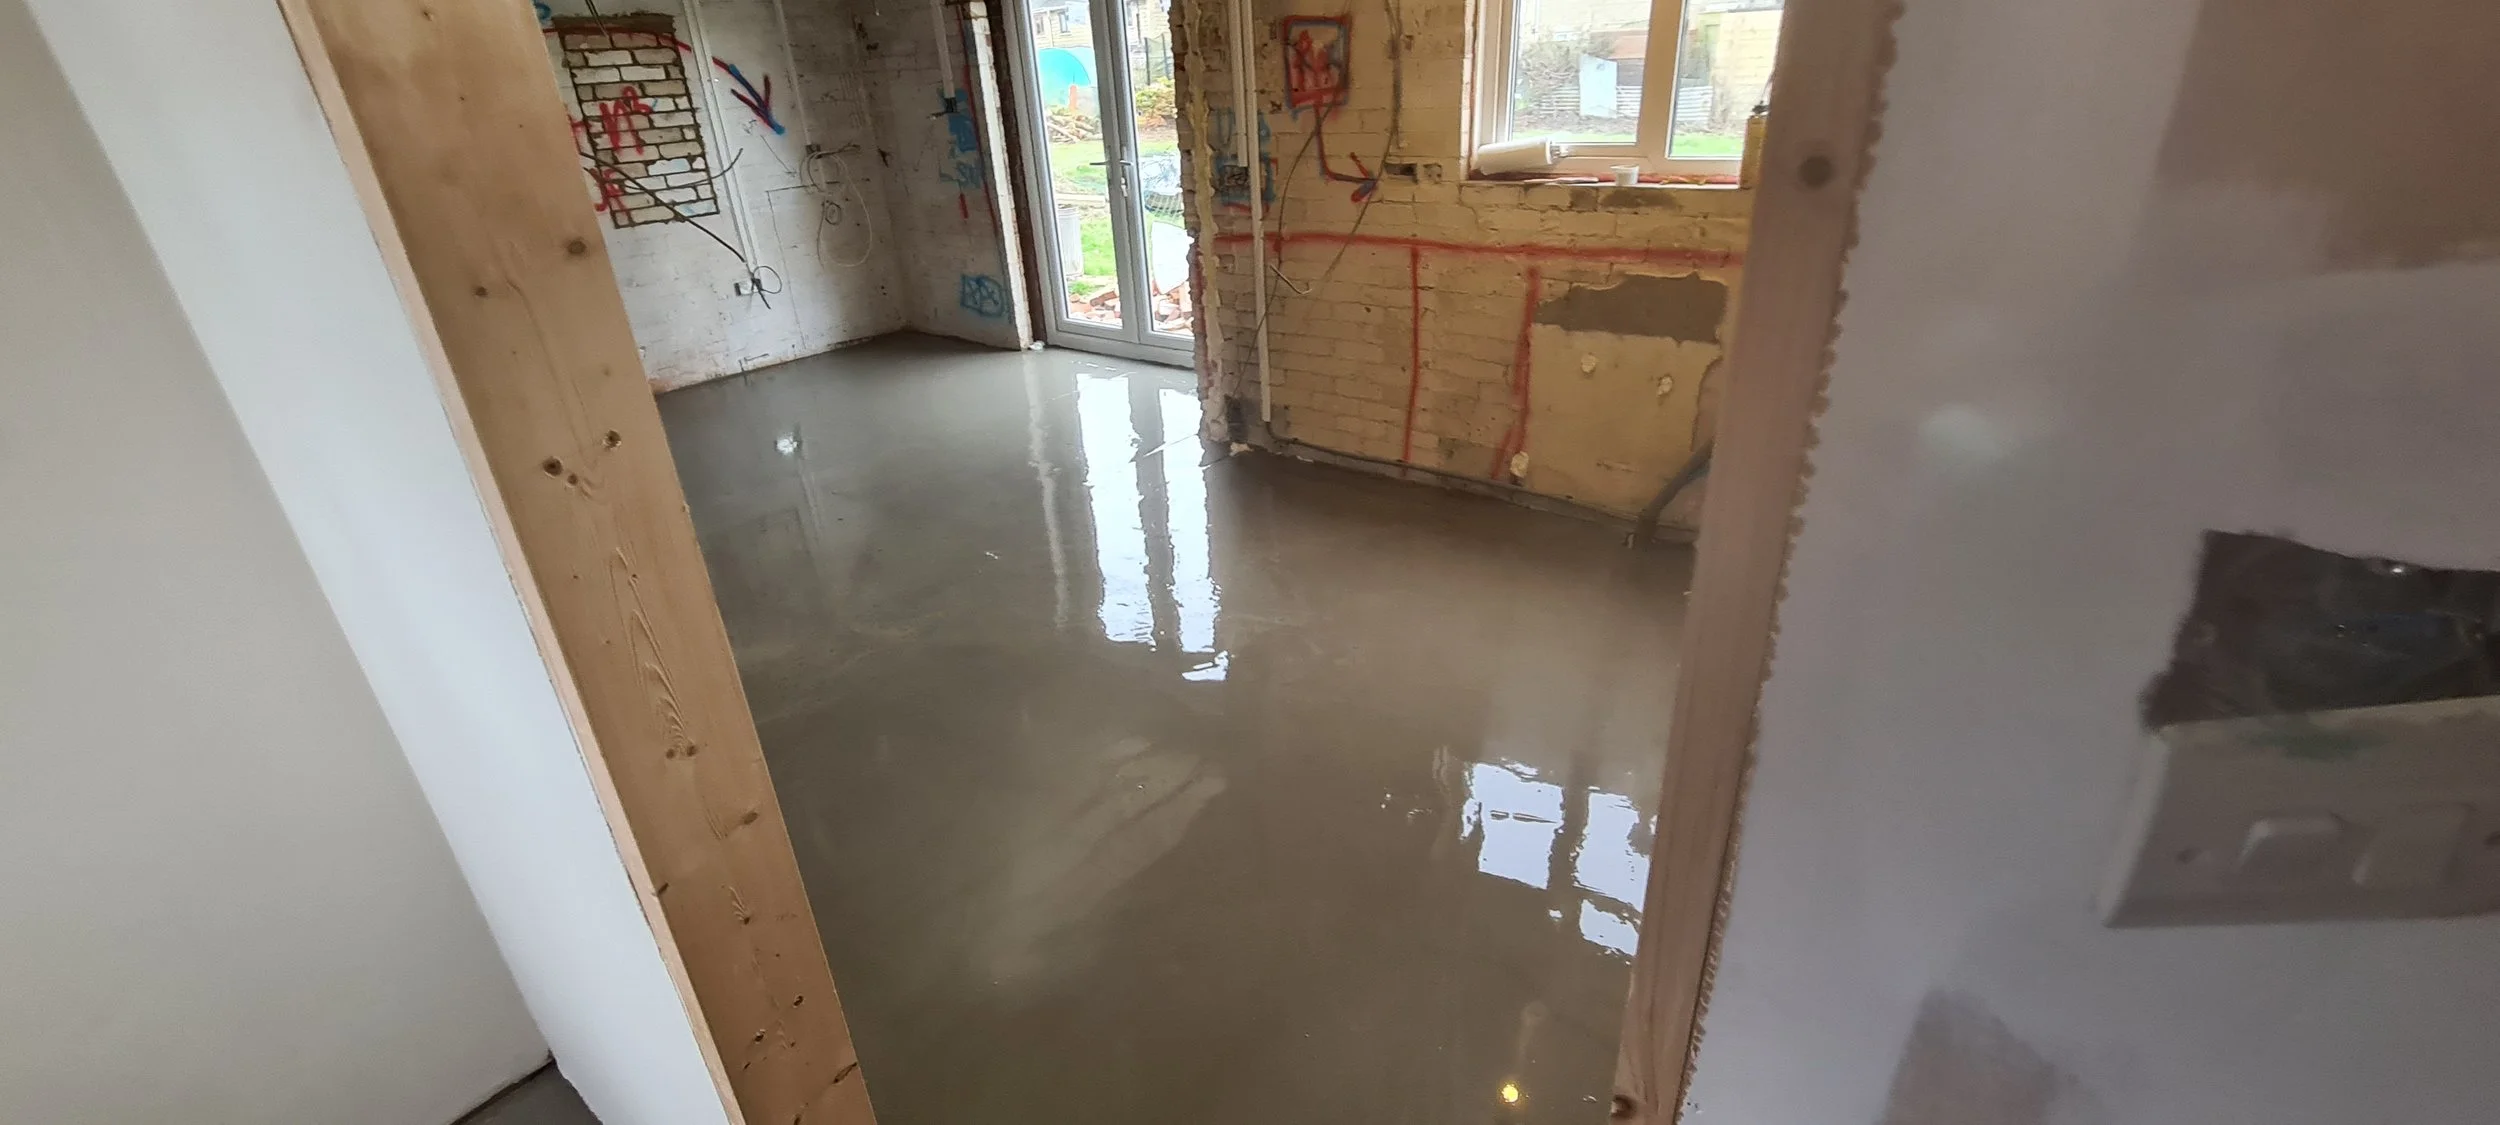
Self leveling
Latexing the floor in a single-story extension involves applying a self-leveling compound, often mixed with latex, to create a smooth and even surface ready for flooring installation. This process is essential for addressing minor imperfections, such as dips or uneven areas, in the subfloor. The latex additive enhances the flexibility and durability of the compound, making it ideal for use over various subfloor materials, including concrete or timber. Before applying the latex compound, the floor must be clean, dry, and primed to ensure proper adhesion. Once poured, the mixture spreads evenly and sets quickly, providing a stable and level base for the final floor finish, such as tiles, laminate, or carpet.
-
![]()
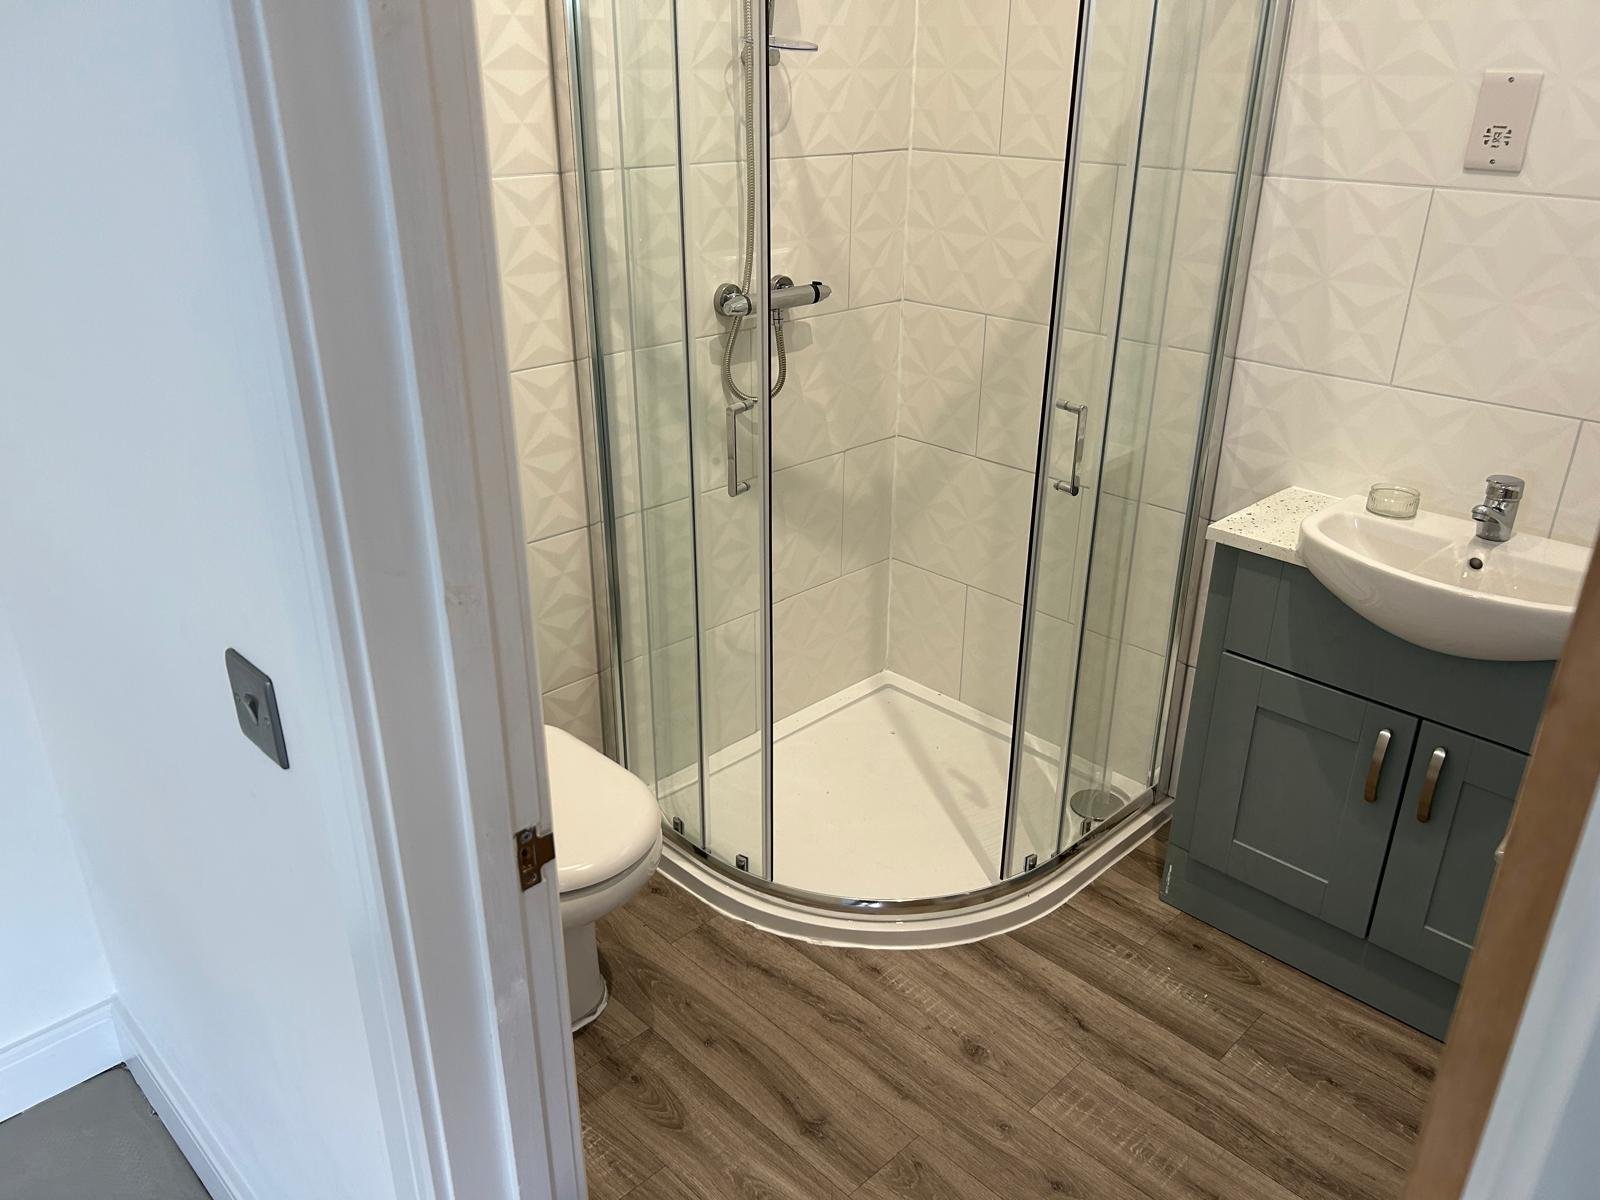
Bathroom Fitting
Bathroom fittings in a small extension require careful planning to maximize space and functionality. Key fittings include compact fixtures such as a wall-mounted toilet, a corner sink, or a slimline vanity unit to save floor area. A walk-in shower or a shower-bath combination can optimize the layout, while storage solutions like recessed shelves or mirrored cabinets add practicality without encroaching on space. Choosing light-colored tiles and reflective surfaces can create a sense of openness, while ensuring proper ventilation prevents moisture buildup in the smaller area. Precise installation of plumbing and fittings is crucial to avoid leaks and maintain efficiency in the compact design.
-
![]()
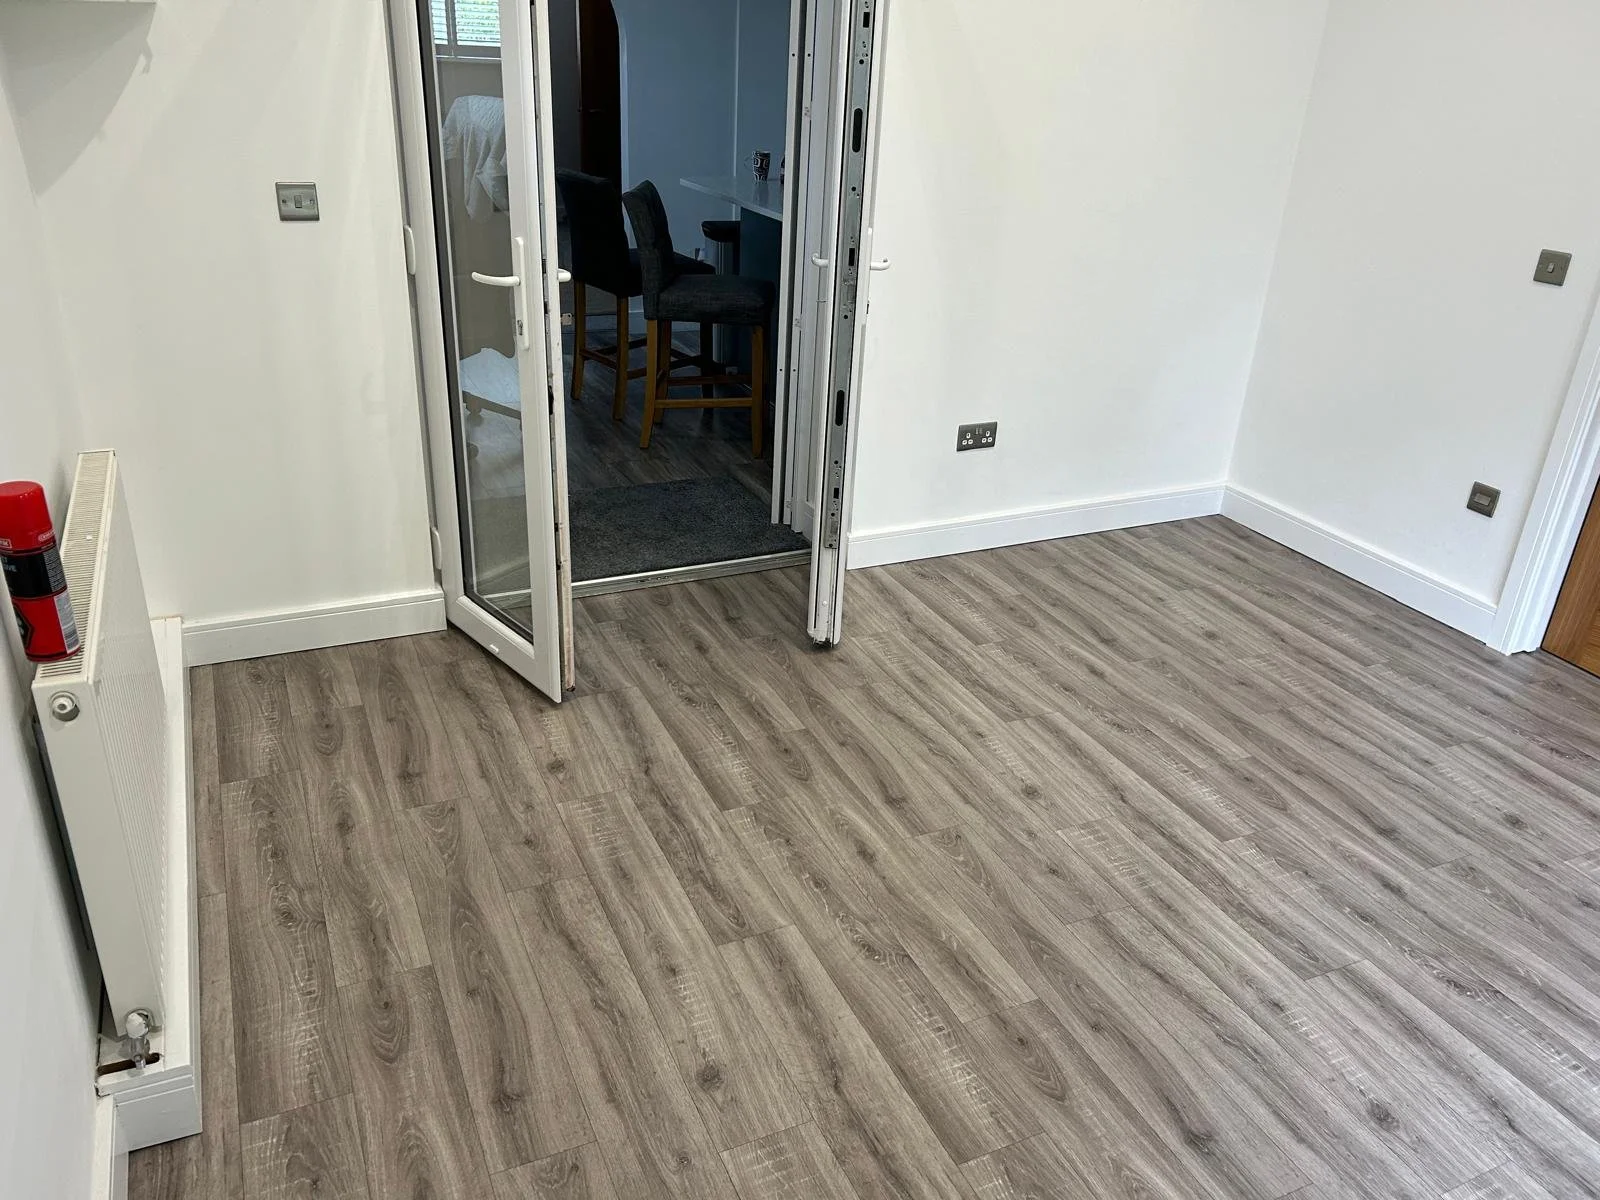
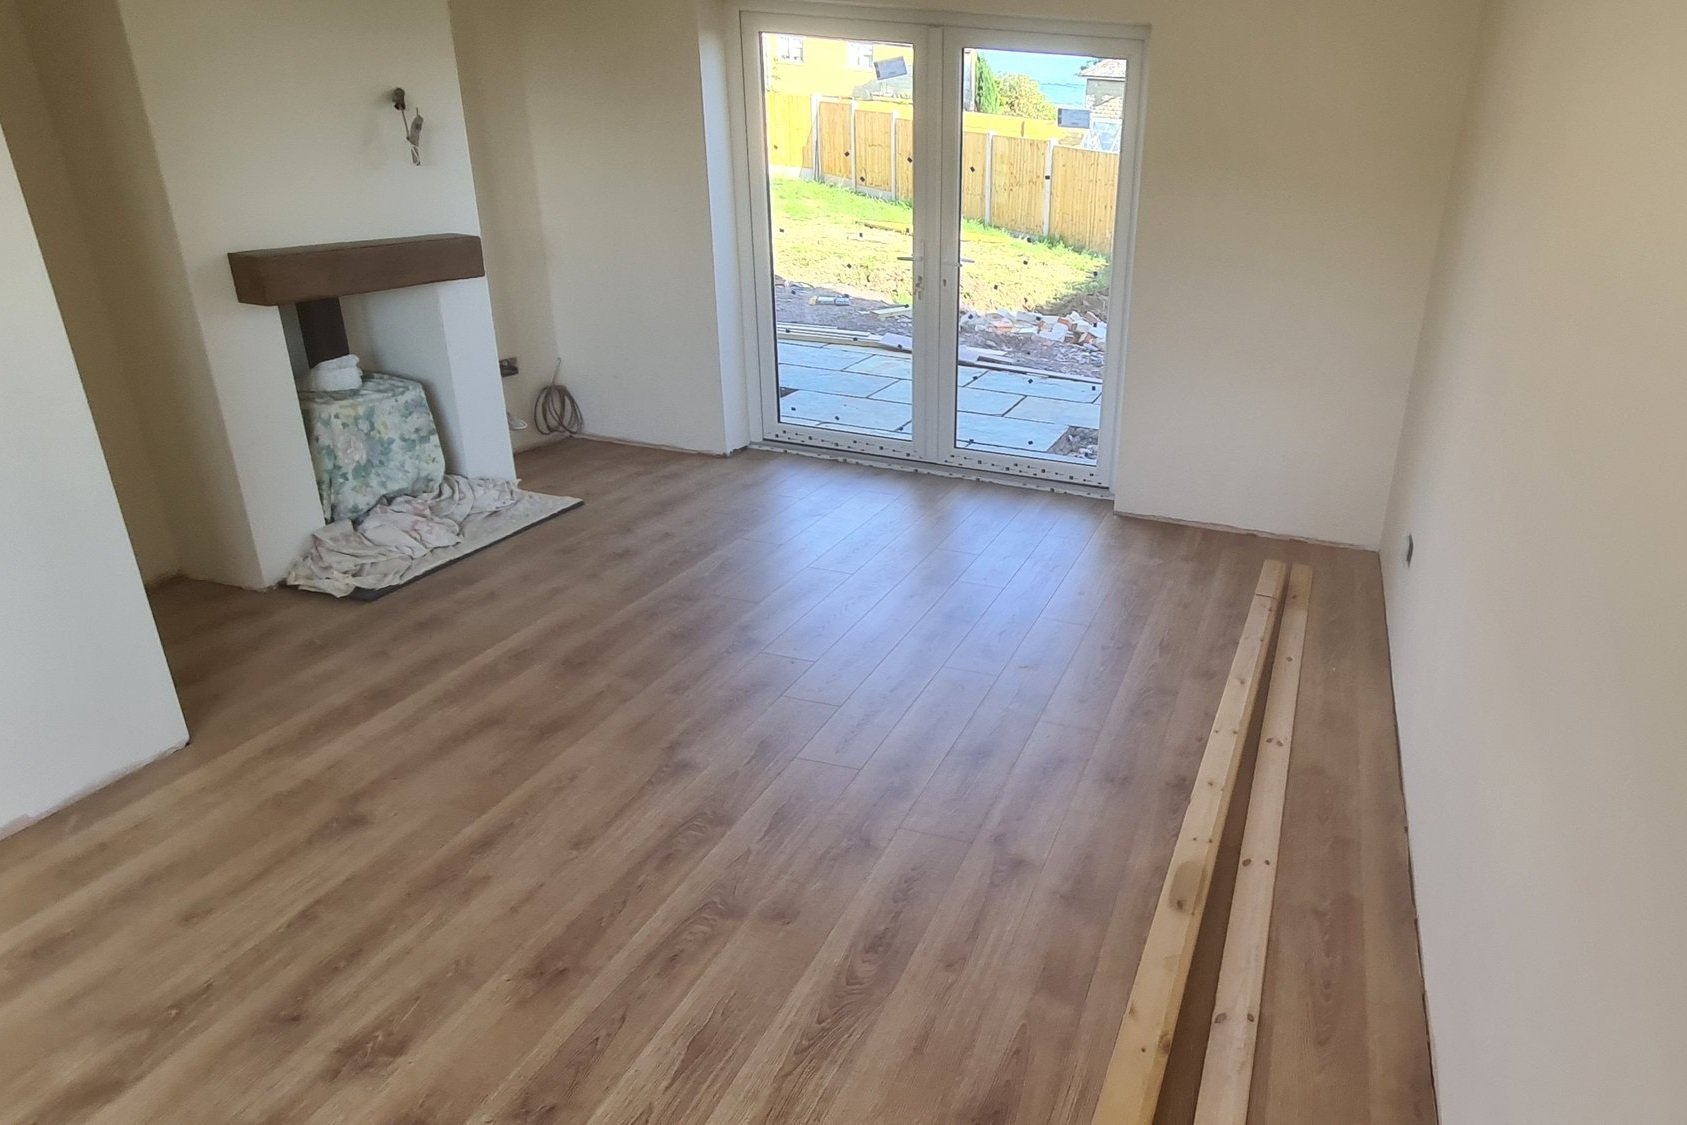
Flooring
Vinyl flooring is an excellent choice for creating a seamless transition between an existing space and a new extension. To achieve a consistent look, it's important to match the color, texture, and pattern of the vinyl to the existing flooring. The subfloor in the extension must be properly prepared, ensuring it is clean, level, and smooth to allow for flawless installation. Using the same direction of plank or tile layout as the original floor enhances continuity. If necessary, expansion joints can be discreetly placed to accommodate movement without disrupting the visual flow. A unified vinyl floor creates a cohesive and spacious feel, tying the old and new areas together harmoniously.
-
![]()
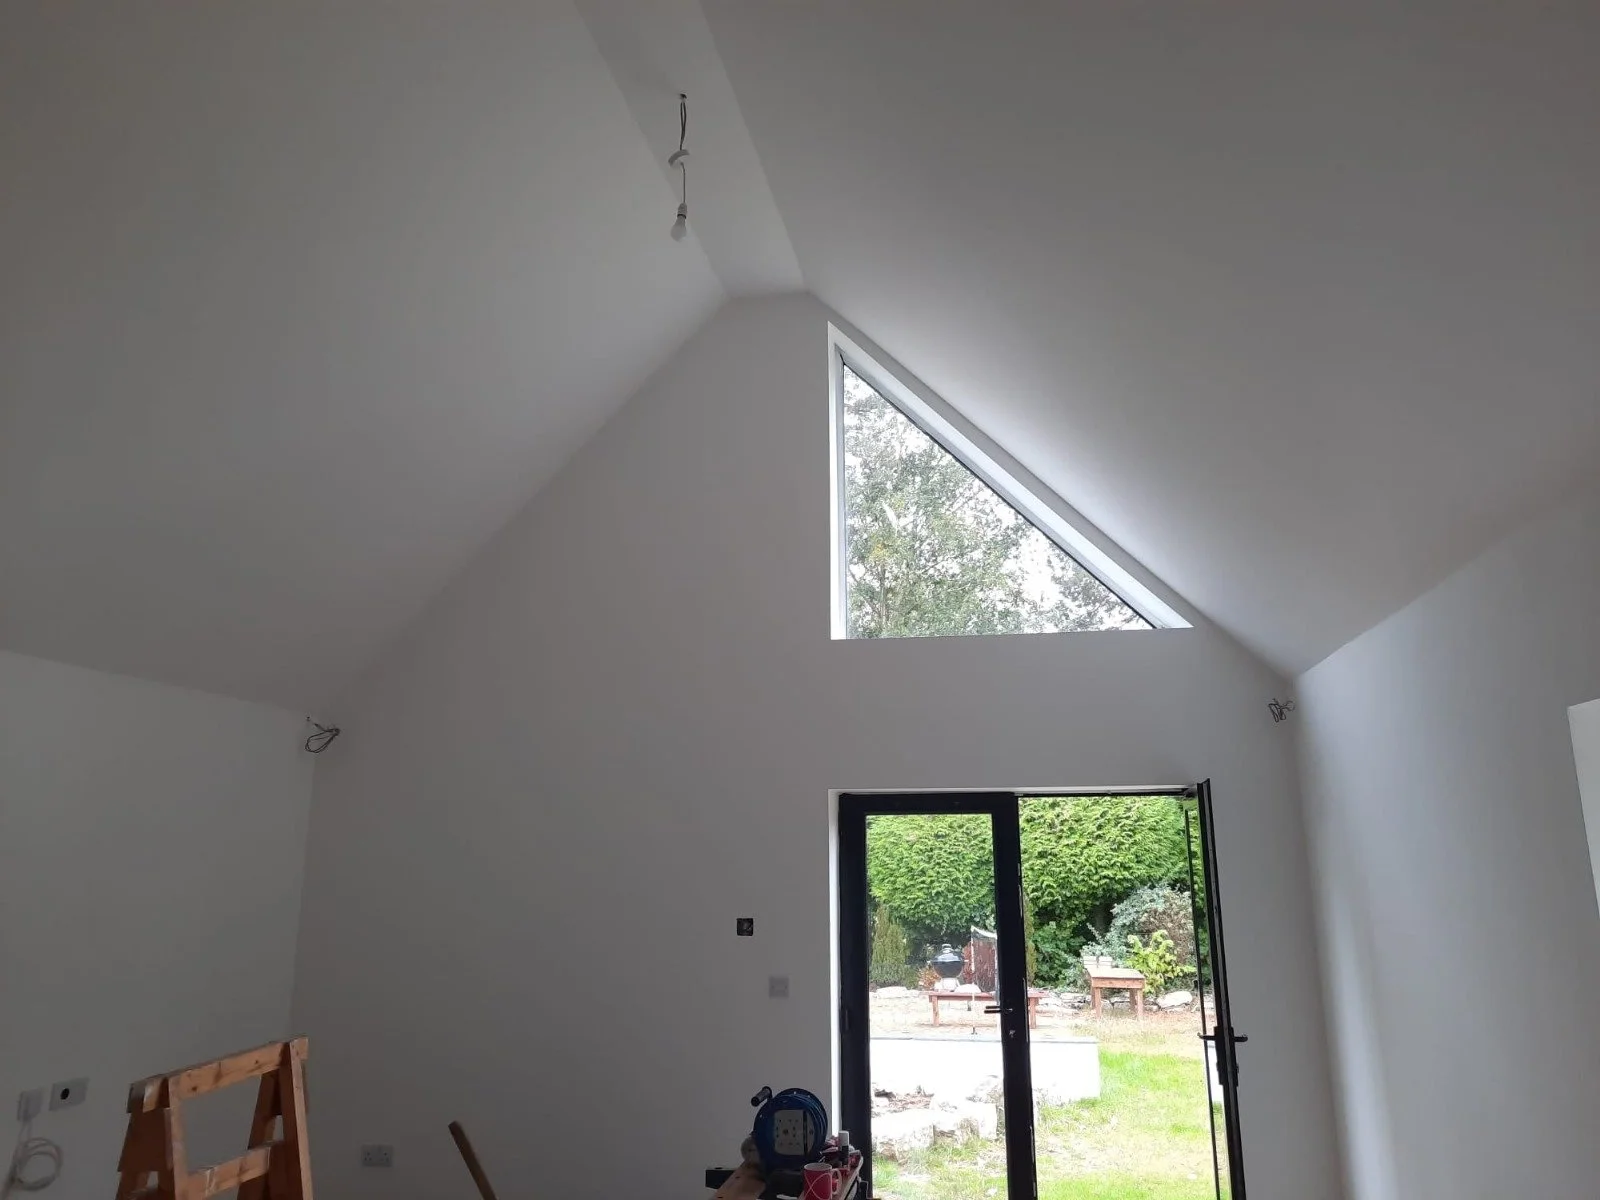
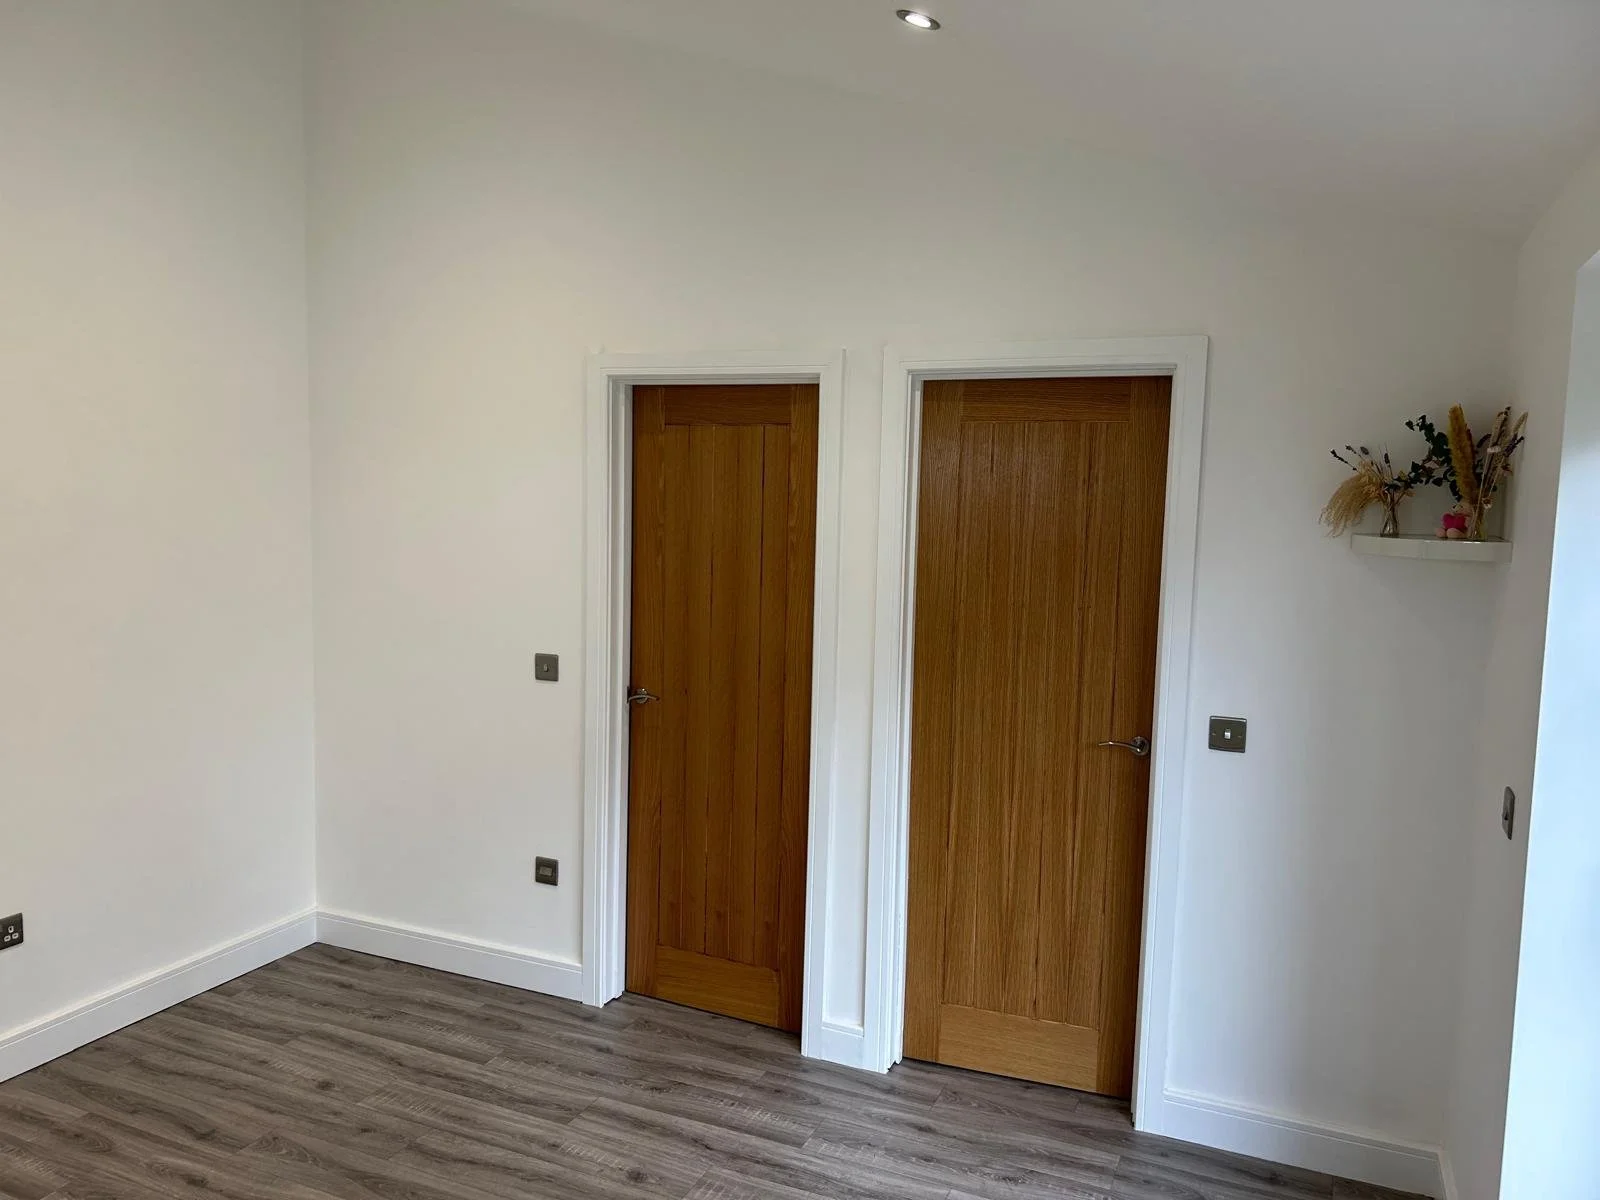
Internal finishes
Decorating, door linings, and doors are key finishing touches in a single-story extension that enhance both functionality and aesthetics. Door linings, which form the framework around the door, must be installed accurately to ensure the door fits and operates smoothly. They should be level and square, with allowance for the chosen flooring thickness. Once the door lining is secured, the door itself can be hung, whether it’s a traditional hinged design, a sliding door, or a space-saving bi-fold option. Decorating around the door includes filling gaps, sanding, and painting or staining to match the interior style, ensuring a seamless and polished look that complements the extension’s design.

Home renovation
-
![]()
Assesing the area
Assessing the area and planning the best way to use the space in an extension involves evaluating the available dimensions, natural light, and intended purpose of the room. Start by considering how the space will be used and prioritize functionality, ensuring the layout accommodates furniture, storage, and movement comfortably. Take note of any existing features, such as windows, doors, or structural elements, and incorporate them into the design. Consider how to maximize light and airflow, using open-plan layouts or strategic placement of openings if possible. Careful planning ensures the space is both practical and visually appealing, making it an efficient and harmonious addition to the home.
-
![]()
Opening up a room
Opening up a room to create more space often involves removing internal walls and installing steel beams (RSJs) to support the load of the structure above. This process starts with a structural assessment to determine the type and size of steel required, ensuring compliance with building regulations. Temporary supports, such as acrow props, are used during the work to maintain structural stability. Once the wall is removed, the steel beam is securely positioned and fixed in place, typically resting on padstones to distribute the load evenly. This method allows for larger, open-plan living areas, creating a modern, spacious feel while maintaining the integrity of the building.
-
![]()
Prepping the floor for latex
Before applying latex to a floor, thorough preparation is crucial to ensure optimal adhesion and a smooth finish. First, clean the floor thoroughly to remove dirt, grease, and any other contaminants that could interfere with the latex bonding. Depending on the floor type, you may need to sand or scrape any uneven areas, old adhesive, or coatings. If the floor has significant cracks or imperfections, fill them in with a suitable filler and allow it to dry completely. In some cases, applying a primer to the surface can help improve adhesion, especially for porous materials. Once the floor is clean, dry, and smooth, you're ready to apply the latex coating for a professional-looking finish.
-
![]()
Latexing the floor
Latexing a kitchen floor is a process that involves applying a layer of latex-based adhesive or coating to enhance the durability, smoothness, and aesthetic of the floor surface. Typically, this technique is used to provide a protective barrier or prepare the floor for further treatments like tiling or painting. The latex coating helps seal and smooth out imperfections, providing better adhesion for the next layer of flooring. This method is especially useful for floors that experience high traffic and need added resilience against moisture, stains, and daily wear. Proper preparation, such as cleaning and priming the floor, is essential for ensuring a long-lasting and smooth finish.
-
![]()
Plaster board
Plasterboard, also known as drywall or gypsum board, is a popular material used in interior construction for creating smooth, flat walls and ceilings. Installing plasterboard involves measuring and cutting the boards to fit the dimensions of the wall or ceiling frame. The boards are typically attached to wooden or metal studs using screws or nails, with careful attention to ensure they are level and aligned. Joints between plasterboard sheets are then taped and covered with joint compound to create a seamless surface. After the compound dries, it is sanded down for a smooth finish, ready for painting or other finishing treatments. Proper installation of plasterboard ensures structural stability and provides a clean, durable surface for interior spaces.
-
![]()
Plastering
Plastering is the process of applying a smooth, hard coating of plaster to walls, ceilings, or other surfaces to create a durable and aesthetically pleasing finish. The process typically involves mixing plaster with water to achieve the right consistency before applying it to a surface using a trowel or float. The plaster is spread evenly and worked into the surface to fill any imperfections or cracks. Once the first layer, or base coat, has dried, a finishing coat is applied to create a smooth, polished surface. After drying, the plaster is often sanded for an ultra-smooth finish, which is ideal for painting or wallpapering. Plastering not only improves the appearance of a space but also provides sound insulation and fire resistance.
-
![]()
Drying
After plaster has dried, it’s important to apply a mist coat before painting to ensure proper adhesion and prevent paint from peeling or cracking. A mist coat is a diluted mixture of paint, typically emulsion, and water. This thin coat is applied to the freshly plastered surface once it has dried but is still slightly porous. The mist coat helps seal the plaster, allowing it to absorb the paint more evenly and prevent the plaster from absorbing too much moisture from the paint, which can lead to a patchy or uneven finish. Typically, the mist coat should be applied lightly with a brush or roller, ensuring full coverage without overloading the surface. Once the mist coat is dry, the full coat of paint can be applied, resulting in a smooth, even, and professional finish.
-
![]()
Floor finishes
Tiling a floor involves a careful process of preparing the surface, laying tiles, and grouting to create a durable and attractive flooring option. First, the floor must be cleaned, leveled, and primed if necessary to ensure a strong bond between the adhesive and the surface. Next, a tile adhesive is spread evenly with a notched trowel, and tiles are placed starting from the center of the room, working outward to maintain symmetry. Tiles are spaced using tile spacers to ensure consistent grout lines, and excess adhesive is removed as you go. Once the tiles are set and the adhesive has dried, grout is applied between the tiles, filling the gaps and providing a finished look. After the grout sets, the tiles are cleaned and sealed if needed, ensuring a long-lasting, easy-to-maintain floor.
-
![]()
Kitchen units
Installing kitchen units involves carefully planning and assembling cabinetry to maximize space, functionality, and aesthetic appeal. The process begins with accurate measurements of the kitchen area to ensure that the units will fit properly. Choosing the right kitchen units depends on factors such as available space, storage needs, and design preferences. For smaller kitchens, compact, modular units can help optimize storage without overwhelming the space, while larger kitchens may benefit from custom or more expansive units that include features like pull-out drawers, built-in organizers, and deep cabinets for extra storage. It's essential to select units made from durable materials that can withstand the demands of daily kitchen activities. Once the units are chosen, proper installation involves securing them to the wall, aligning them correctly, and ensuring that all components, such as doors and drawers, function smoothly. Careful installation ensures the kitchen units are both functional and visually appealing, contributing to an organized and efficient kitchen layout.
-
![]()
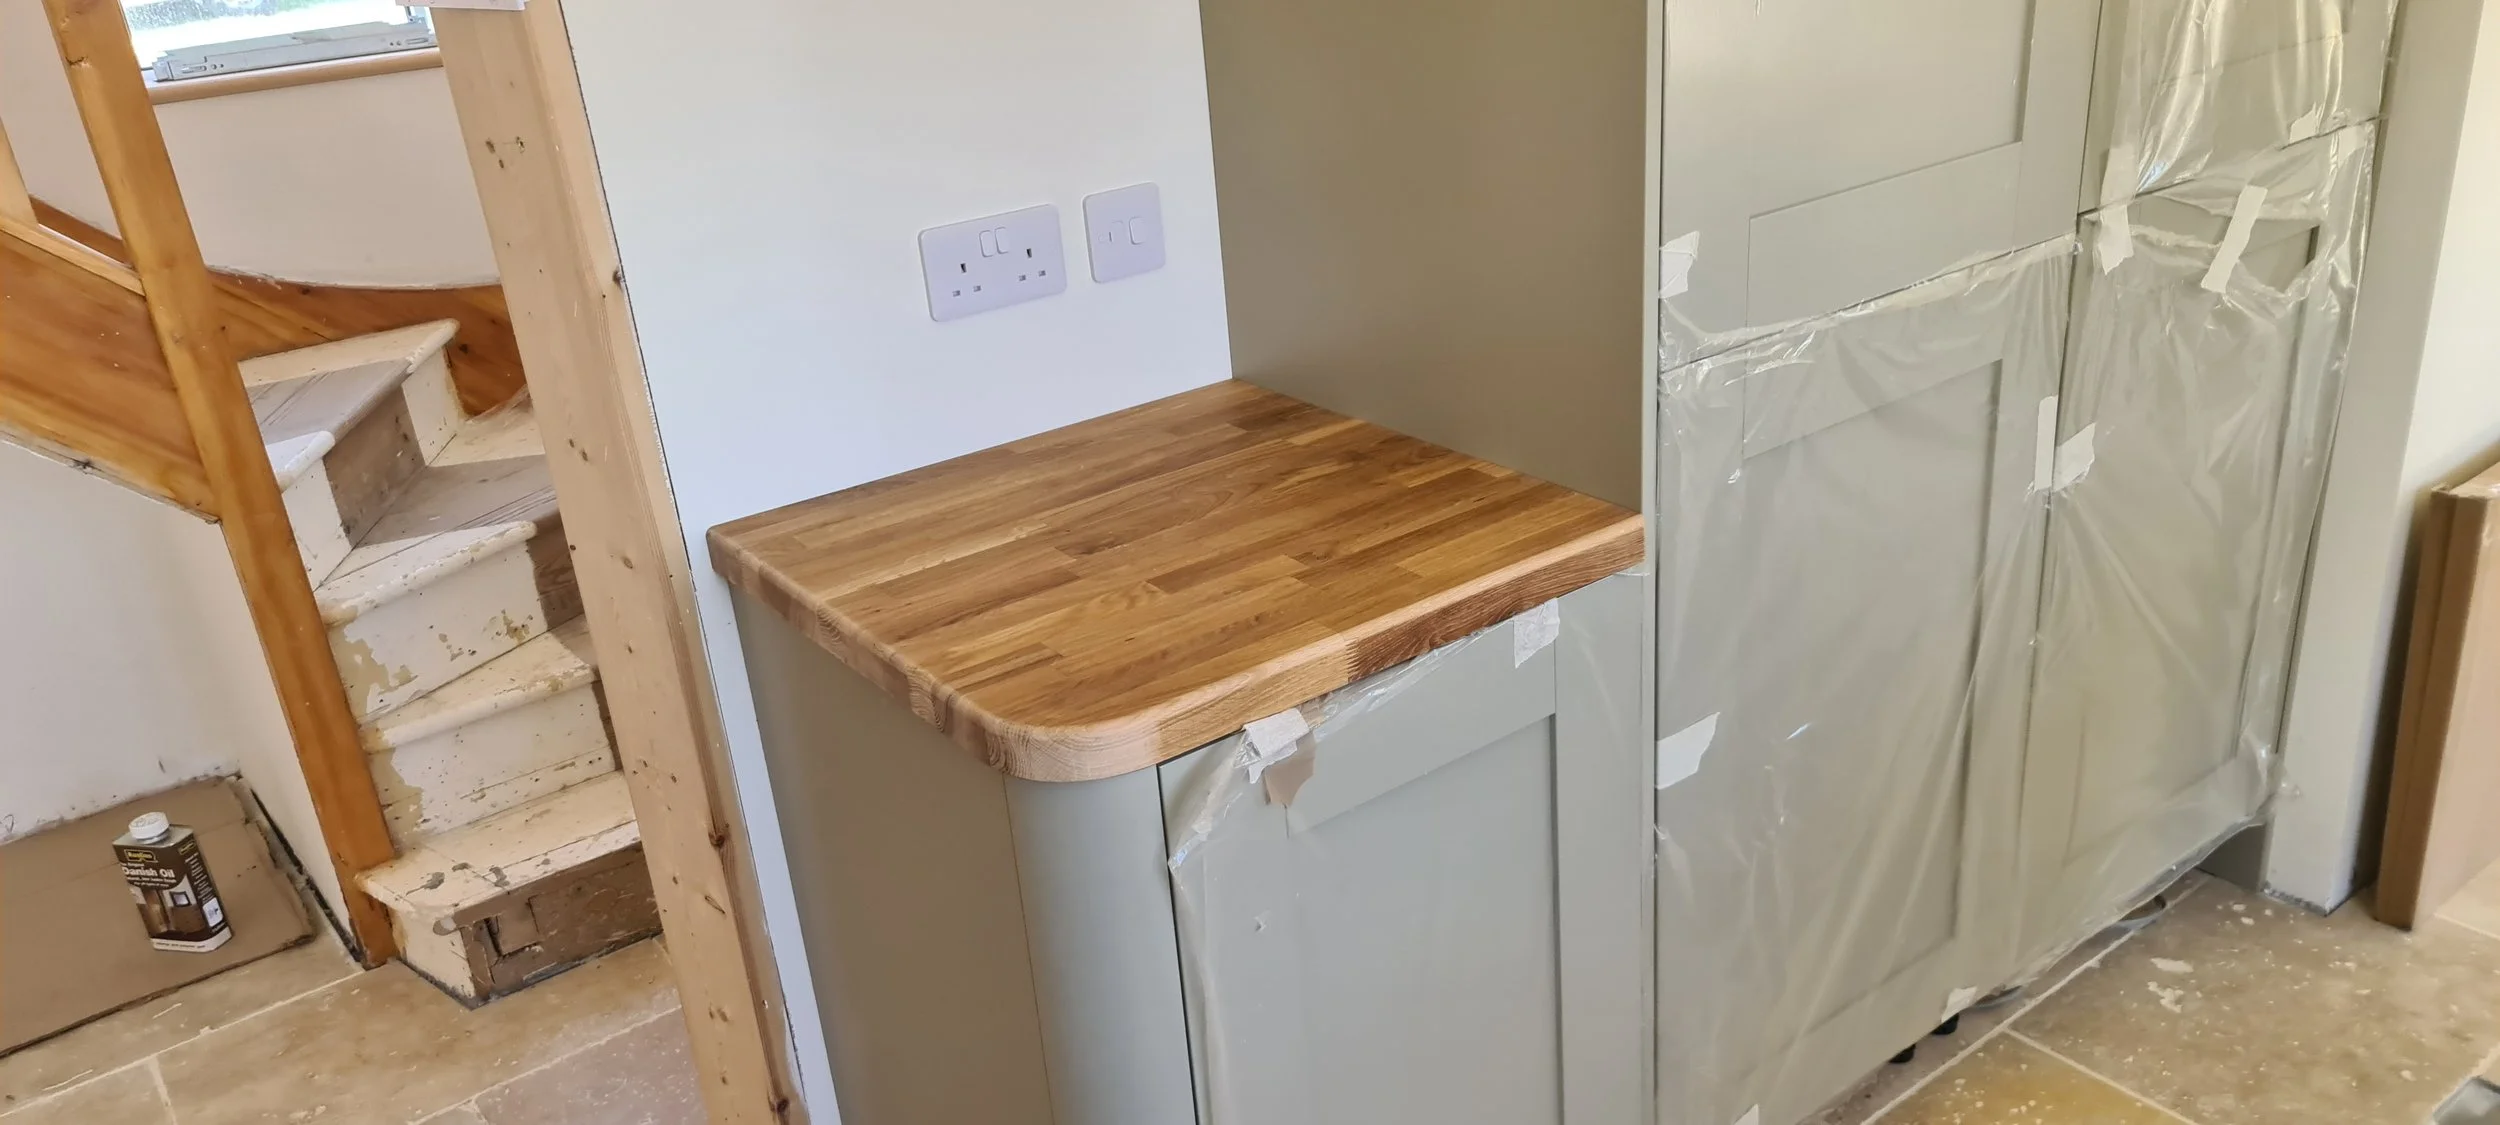
Kitchen worktops
Wooden kitchen worktops are a timeless and versatile choice for countertops, offering a natural aesthetic that adds warmth and character to any kitchen. Made from hardwoods like oak, maple, or walnut, these worktops are durable and can withstand the wear and tear of daily kitchen tasks, such as chopping, cutting, and food preparation. To ensure longevity, wooden worktops require regular maintenance, including oiling or sealing to protect the surface from moisture, stains, and scratches. Proper care can help prevent cracking or warping, allowing the wood to age beautifully over time. Additionally, wooden worktops can be sanded and refinished if they become damaged, making them a long-lasting and customizable option for any kitchen design.
-
![]()
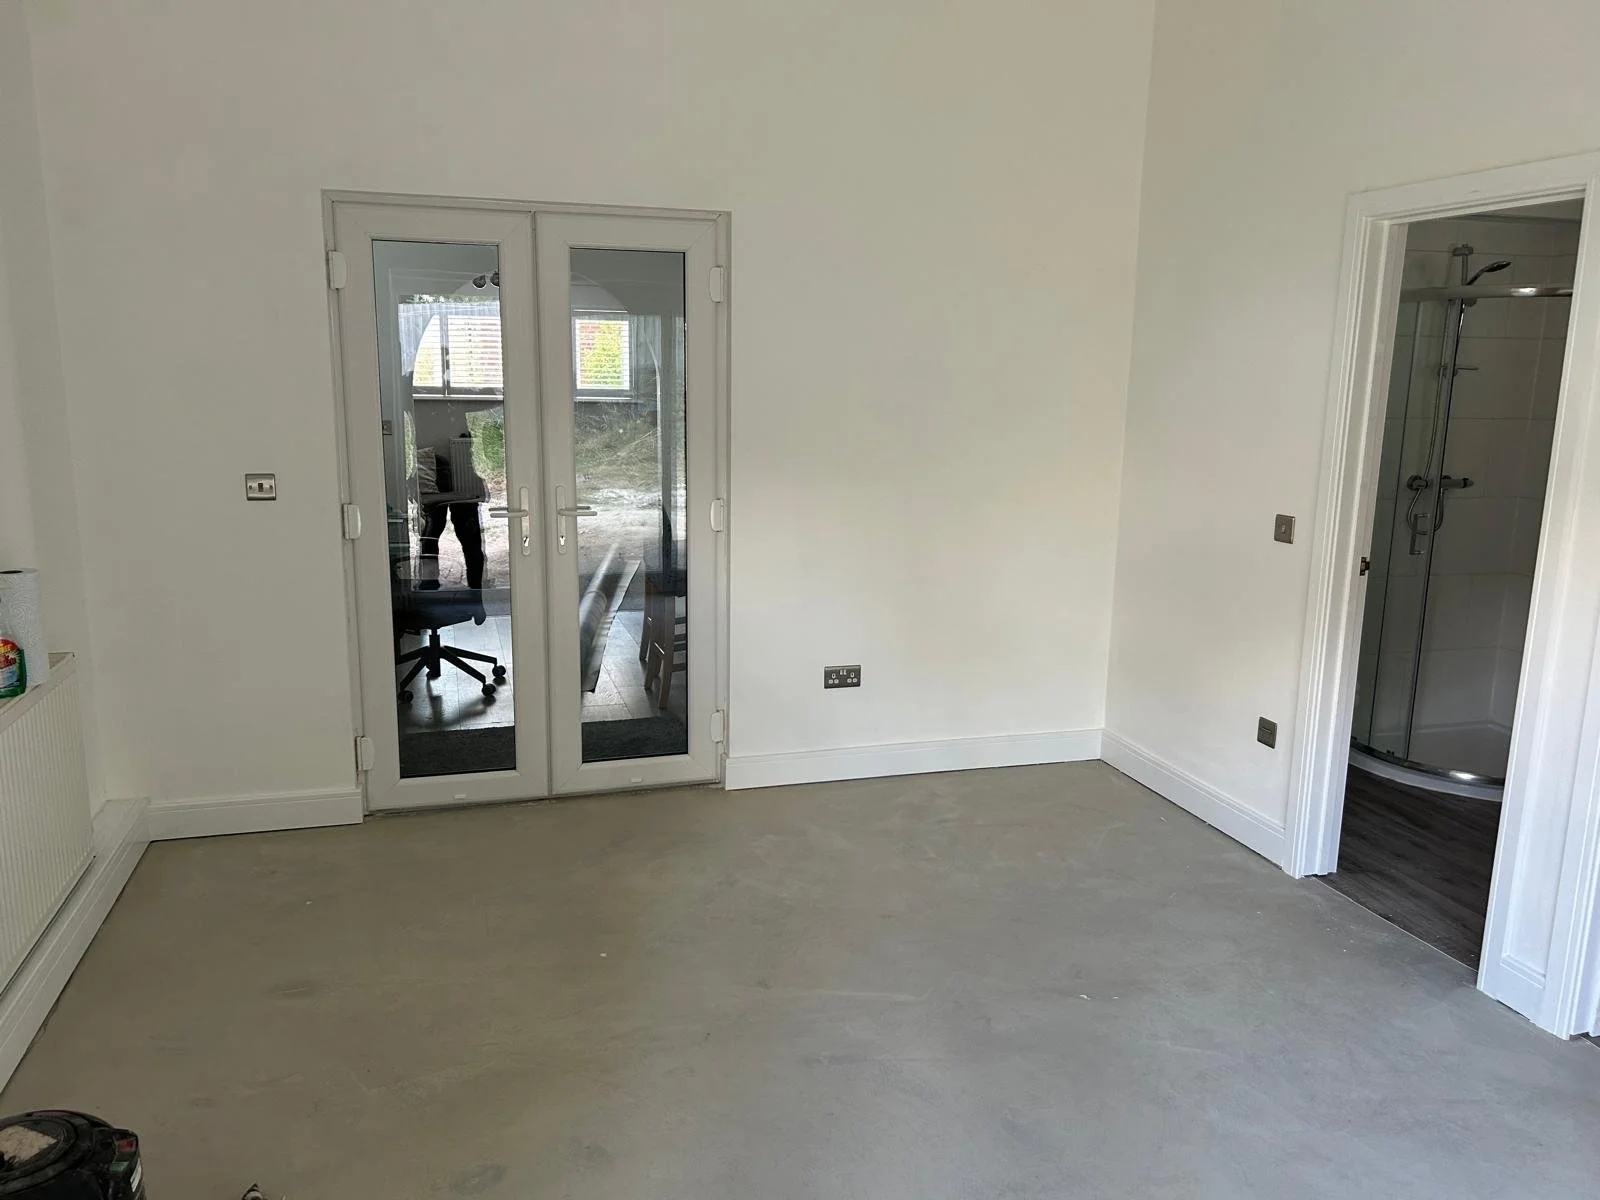
Patio doors
Patio doors are large, sliding or hinged doors designed to provide easy access to outdoor spaces while allowing natural light to flood into the interior of a home. Typically made from glass, patio doors offer expansive views of the garden, deck, or patio, creating a seamless connection between the indoors and outdoors. Sliding patio doors are often chosen for their space-saving design, as they open by gliding along a track, making them ideal for rooms with limited space. Hinged patio doors, on the other hand, open like a traditional door and may require more space to swing open. Both types can be equipped with various frame materials, including wood, aluminum, or uPVC, offering different levels of insulation, durability, and aesthetics. Properly installed, patio doors enhance the flow of natural light, improve ventilation, and add a stylish focal point to any home while also providing convenience and easy outdoor access.
-
![]()
Living rooms
Living rooms are central spaces in a home designed for relaxation, socializing, and entertainment. Typically furnished with comfortable seating like sofas, armchairs, and coffee tables, living rooms serve as a gathering place for family and guests. The layout and design of the room often reflect personal style, with a range of decor options from cozy and rustic to modern and sleek. In addition to seating, living rooms often include entertainment features such as televisions, sound systems, and bookshelves. Lighting plays a key role in creating a welcoming atmosphere, with a mix of natural light from windows and ambient lighting from lamps or overhead fixtures. The living room is often the focal point of home life, where families unwind, share stories, and enjoy shared activities, making it a vital area for both functionality and comfort.


New build annex
-
![]()
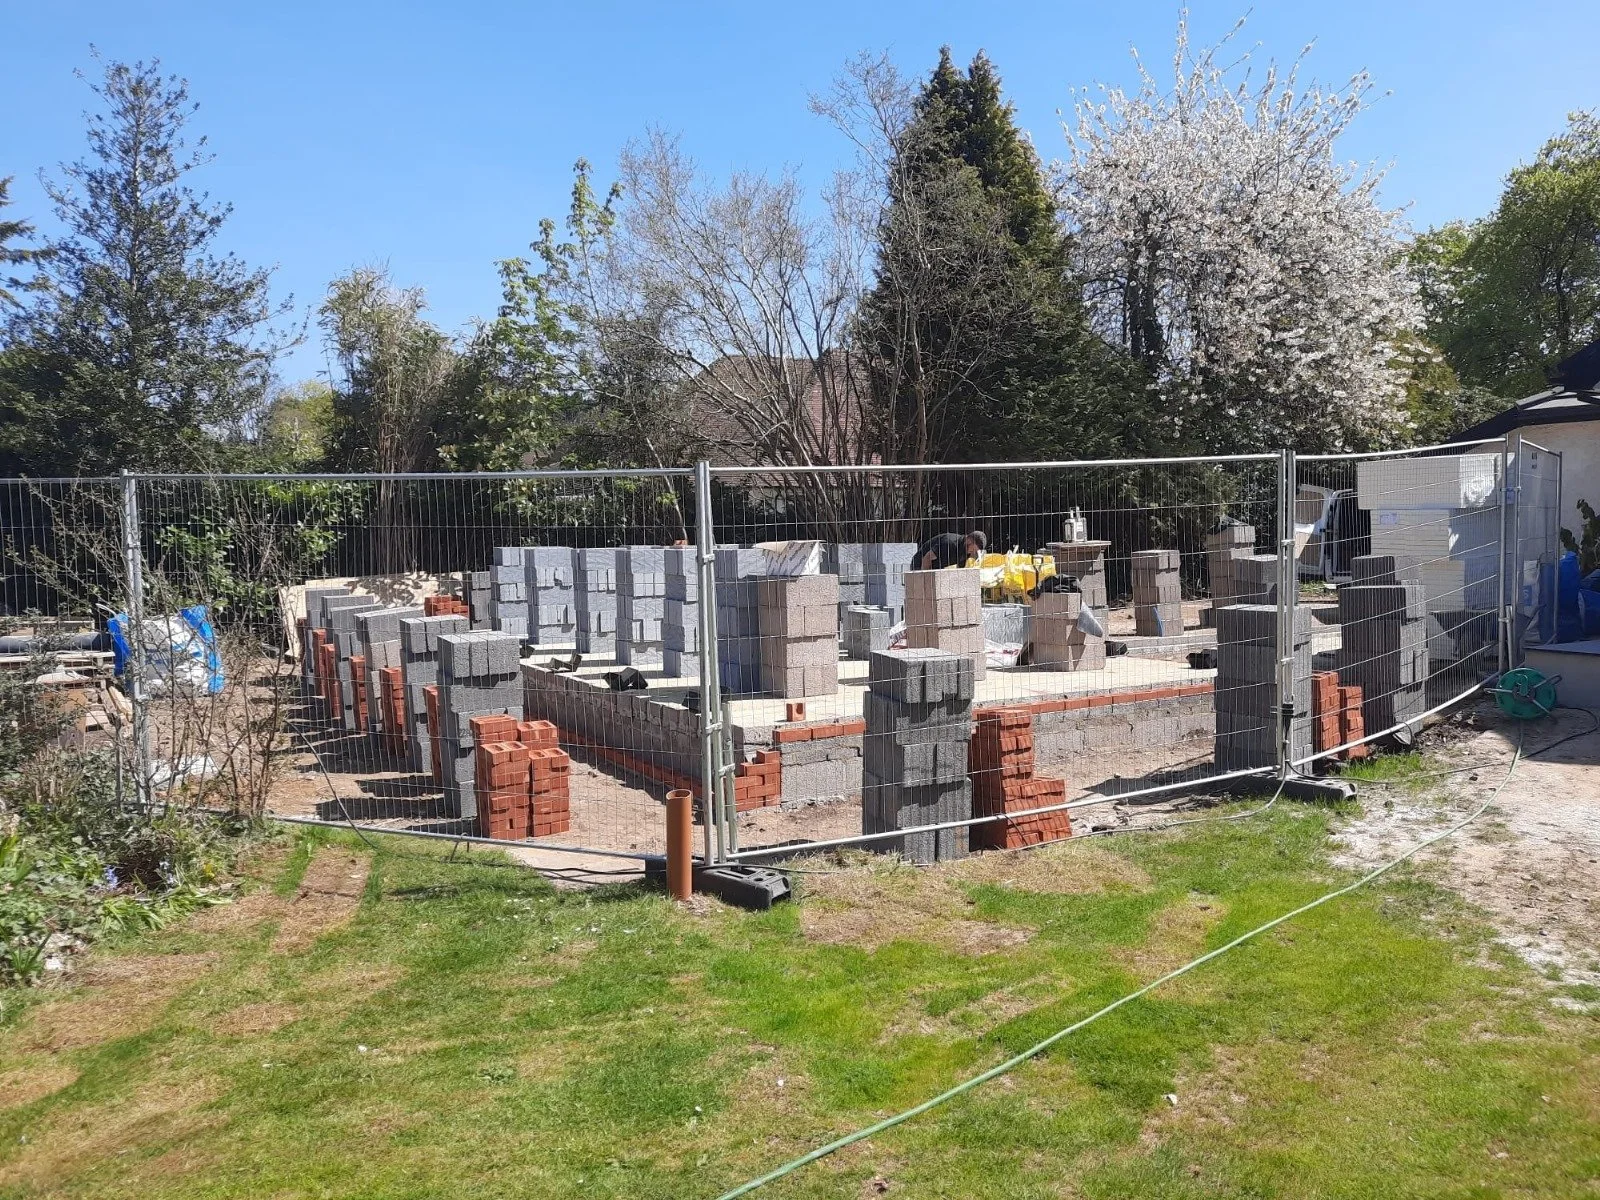
Setting out
Properly setting out blocks and bricks on a new build is crucial to ensuring the structural integrity, accuracy, and aesthetic appeal of the project. Accurate setting out ensures that walls are straight, level, and plumb, which is essential for the stability and longevity of the structure. It also helps avoid costly errors or delays caused by misalignment or incorrect measurements. Precise setting out is vital for achieving a seamless fit with other building components, such as doors, windows, and roofing, ensuring everything aligns correctly. Additionally, a well-executed layout enhances the visual appeal of the building by maintaining consistent joint widths and a clean, professional finish. Overall, proper setting out establishes a strong foundation for the success of the construction project.
-
![]()
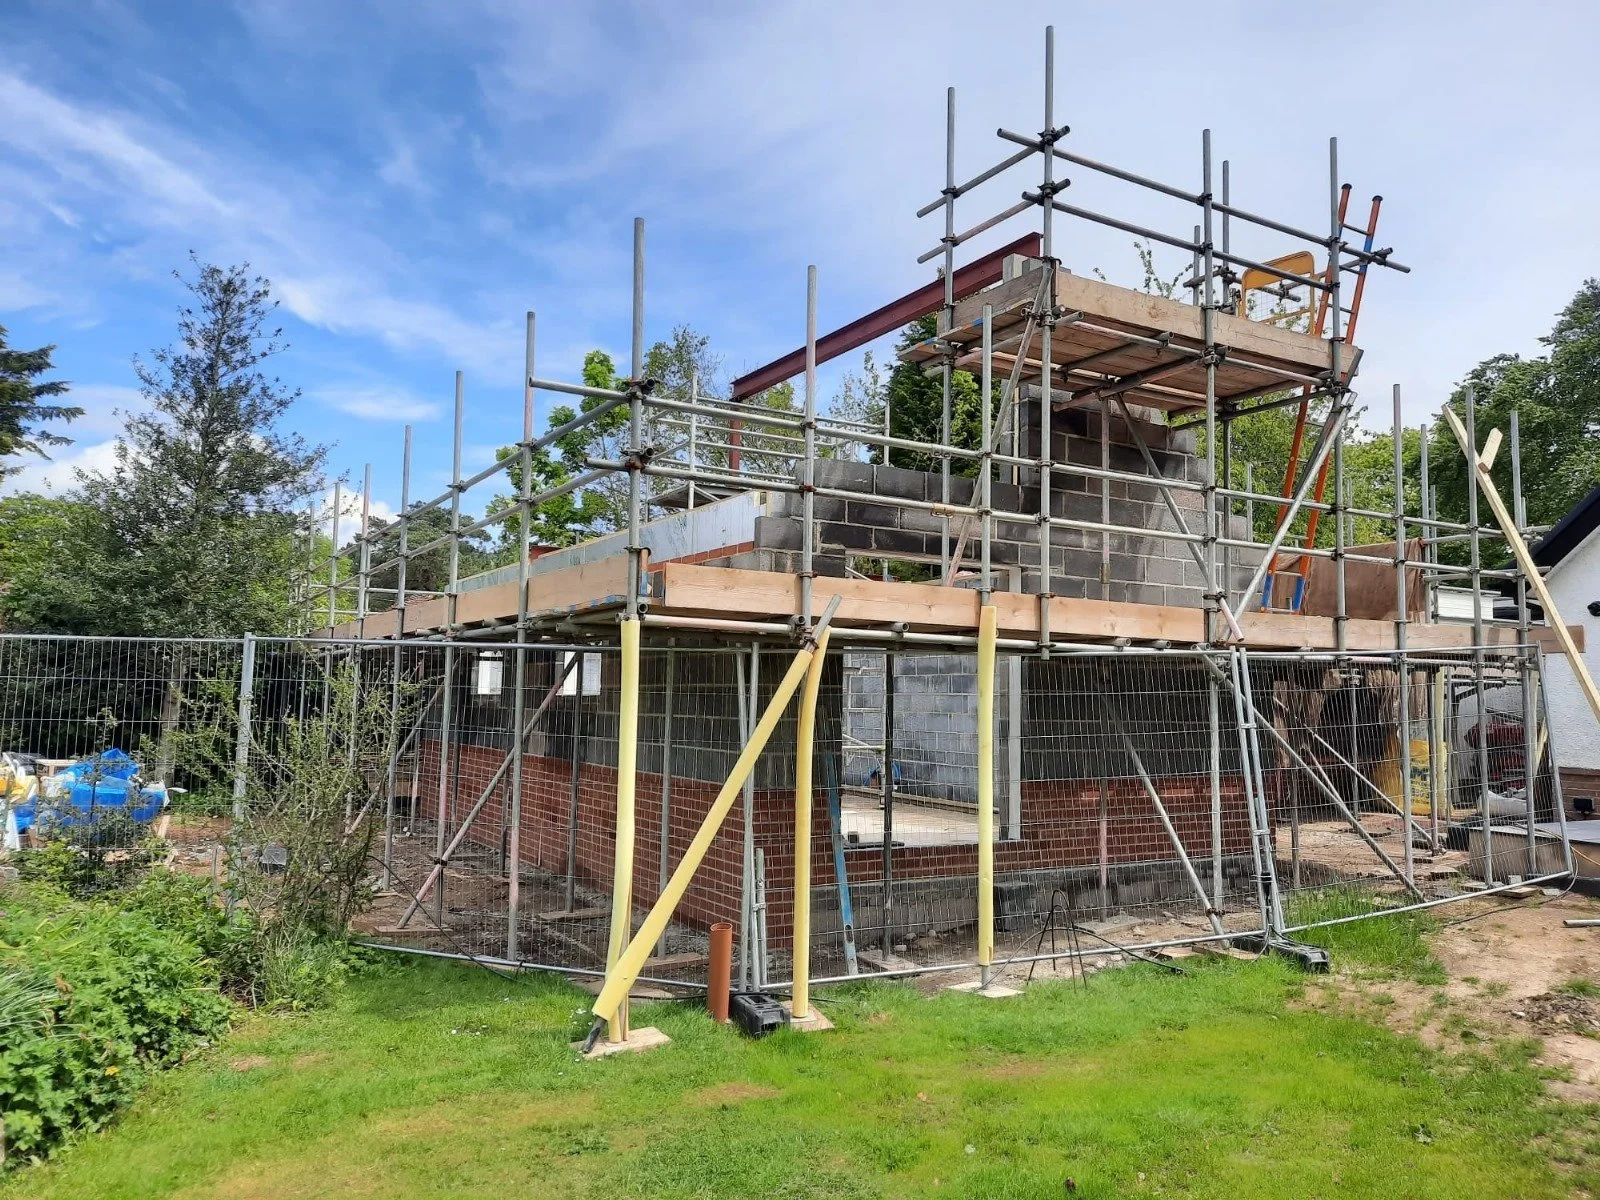
Moving up
Moving up to a second floor using scaffolding is a critical aspect of multi-story construction that ensures both efficiency and safety. Scaffolding provides a stable and secure platform for workers, tools, and materials, allowing tasks like bricklaying, rendering, or installing structural components to be carried out safely at height. Properly installed scaffolding minimizes the risk of falls and accidents by providing guardrails, toe boards, and stable footing. It also facilitates smooth workflow by enabling easy access to all areas of the second floor, ensuring precision and consistency in the construction process. Moreover, scaffolding supports the safe transportation of materials to higher levels, reducing strain on workers and maintaining productivity throughout the project.
-
![]()
Flat roof
Creating a flat roof involves careful planning and precise execution to ensure durability, weather resistance, and functionality. The process begins with constructing a strong framework, typically using timber or steel joists, to provide the necessary structural support. A flat roof must have a slight slope, known as a "fall," to allow water to drain effectively, preventing pooling and potential water damage. Waterproofing is critical, often achieved with materials like EPDM rubber, bitumen, or fibreglass, to protect the roof from leaks and weather-related wear. Insulation is added to improve energy efficiency and regulate indoor temperatures. Finally, the roof's surface is finished with layers of protective coatings or membranes to enhance its lifespan and resist UV exposure. Proper design and installation of a flat roof ensure it remains functional, safe, and low-maintenance over time.
-
![]()
Brickwork
Neat brickwork is essential for creating a visually appealing, durable, and structurally sound construction. Precise alignment, even mortar joints, and a clean finish not only enhance the building's aesthetic but also contribute to its integrity by ensuring even weight distribution and resistance to external forces. Laying bricks in the rain should be avoided because excess moisture can compromise the mortar’s strength and bonding properties, leading to weakened joints and potential structural issues. Rain can also wash away mortar, create uneven surfaces, and cause staining on the bricks, detracting from the overall appearance. Ensuring dry working conditions allows for better control over the mortar’s consistency and ensures a professional, long-lasting finish.
-
![]()
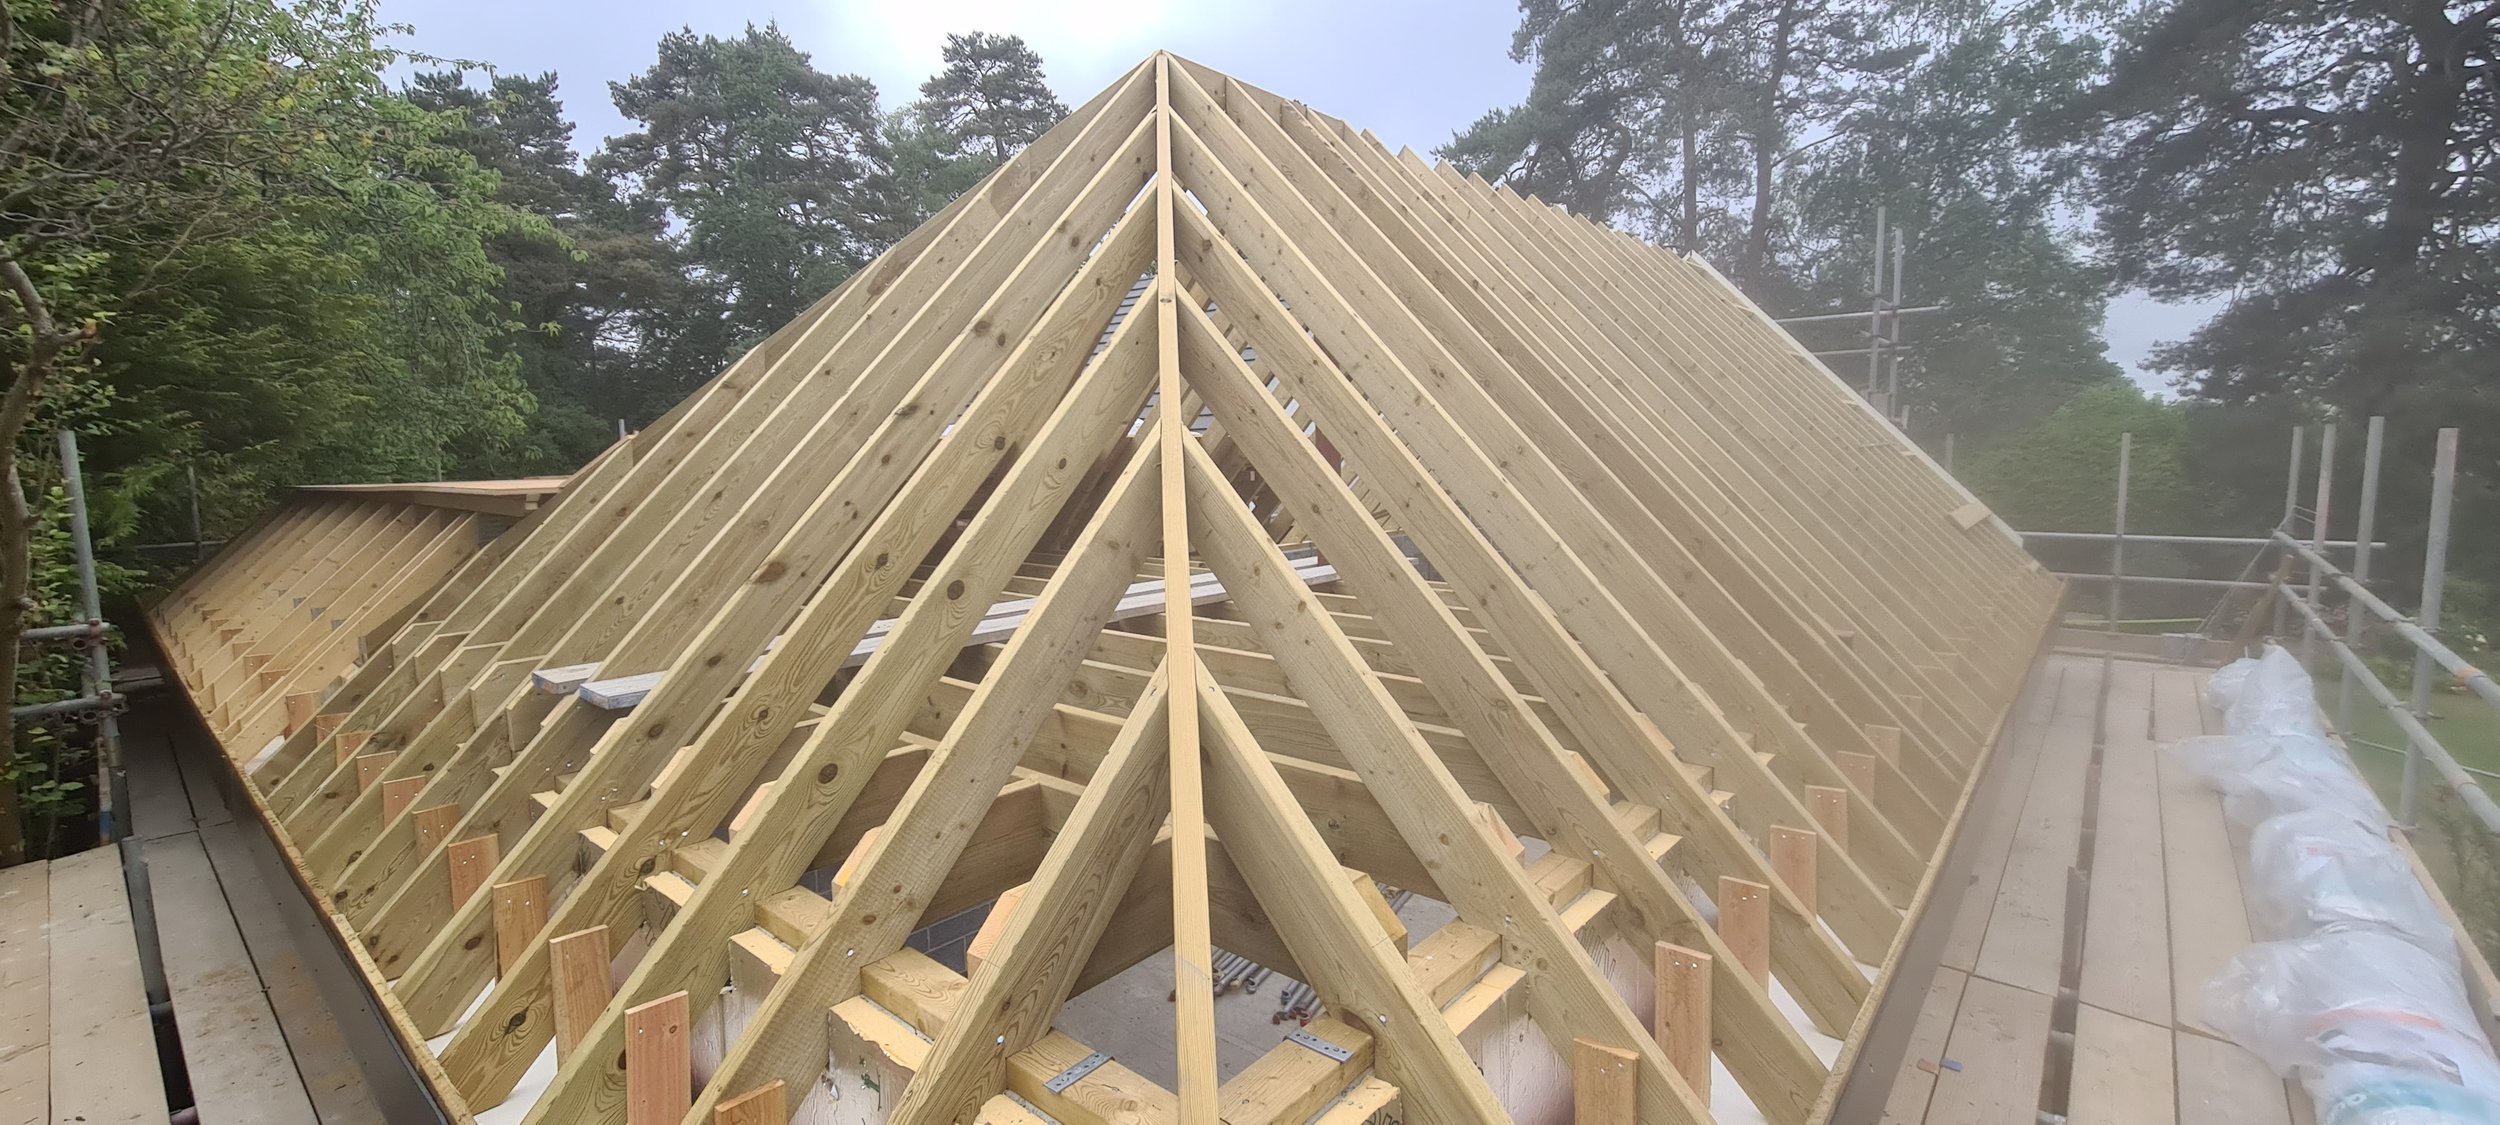
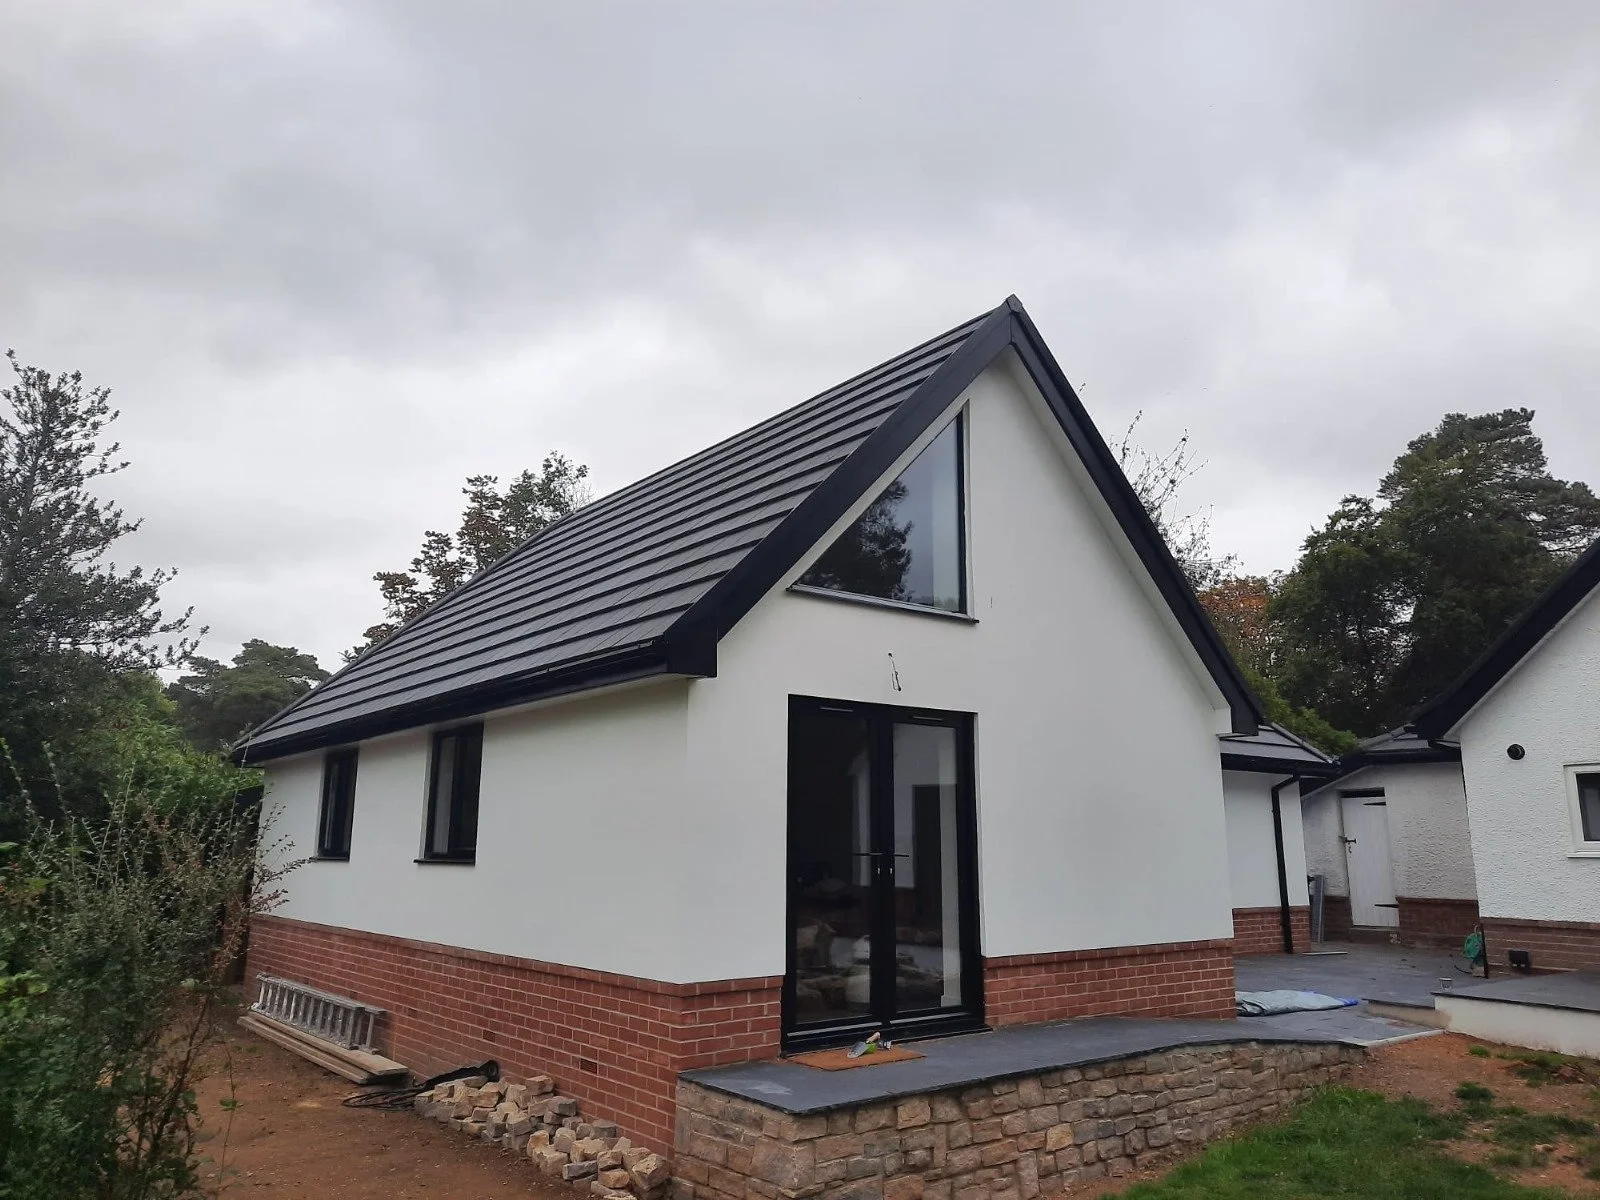
Pitched roof
Creating a pitched cut roof is a meticulous process that combines structural integrity with aesthetic appeal. It involves accurately measuring and cutting timber rafters to form a strong framework that supports the roof’s weight and withstands environmental pressures. The roof's pitch is carefully calculated to ensure proper drainage and compatibility with the building's design and local climate. A ridge beam typically forms the central spine, while rafters are cut and fixed at precise angles to meet at the ridge and extend to the wall plates. Additional elements such as purlins, collars, or struts may be added for extra support. Proper insulation, underlayment, and roofing materials, such as tiles or shingles, are then installed to protect against weather elements. Precision and craftsmanship in constructing a pitched cut roof result in a durable, efficient, and visually striking feature for the building.
-
![]()
Creating rooms
Creating internal stud walls is a practical way to divide spaces and provide structural support for fixtures in a building. The process begins with planning the wall’s location and ensuring it aligns with floor and ceiling joists for maximum stability. Timber or metal studs are then measured, cut, and installed vertically between top and bottom plates, forming the wall's framework. Horizontal noggins may be added to enhance rigidity and provide additional fixing points. Once the frame is secured, plasterboard is attached to both sides, creating a smooth surface for finishing with paint or wallpaper. Stud walls also allow space for insulation, soundproofing, or running utilities such as electrical wiring and plumbing. Properly constructed internal stud walls are lightweight, versatile, and cost-effective, making them a popular choice in modern construction.
-
![]()
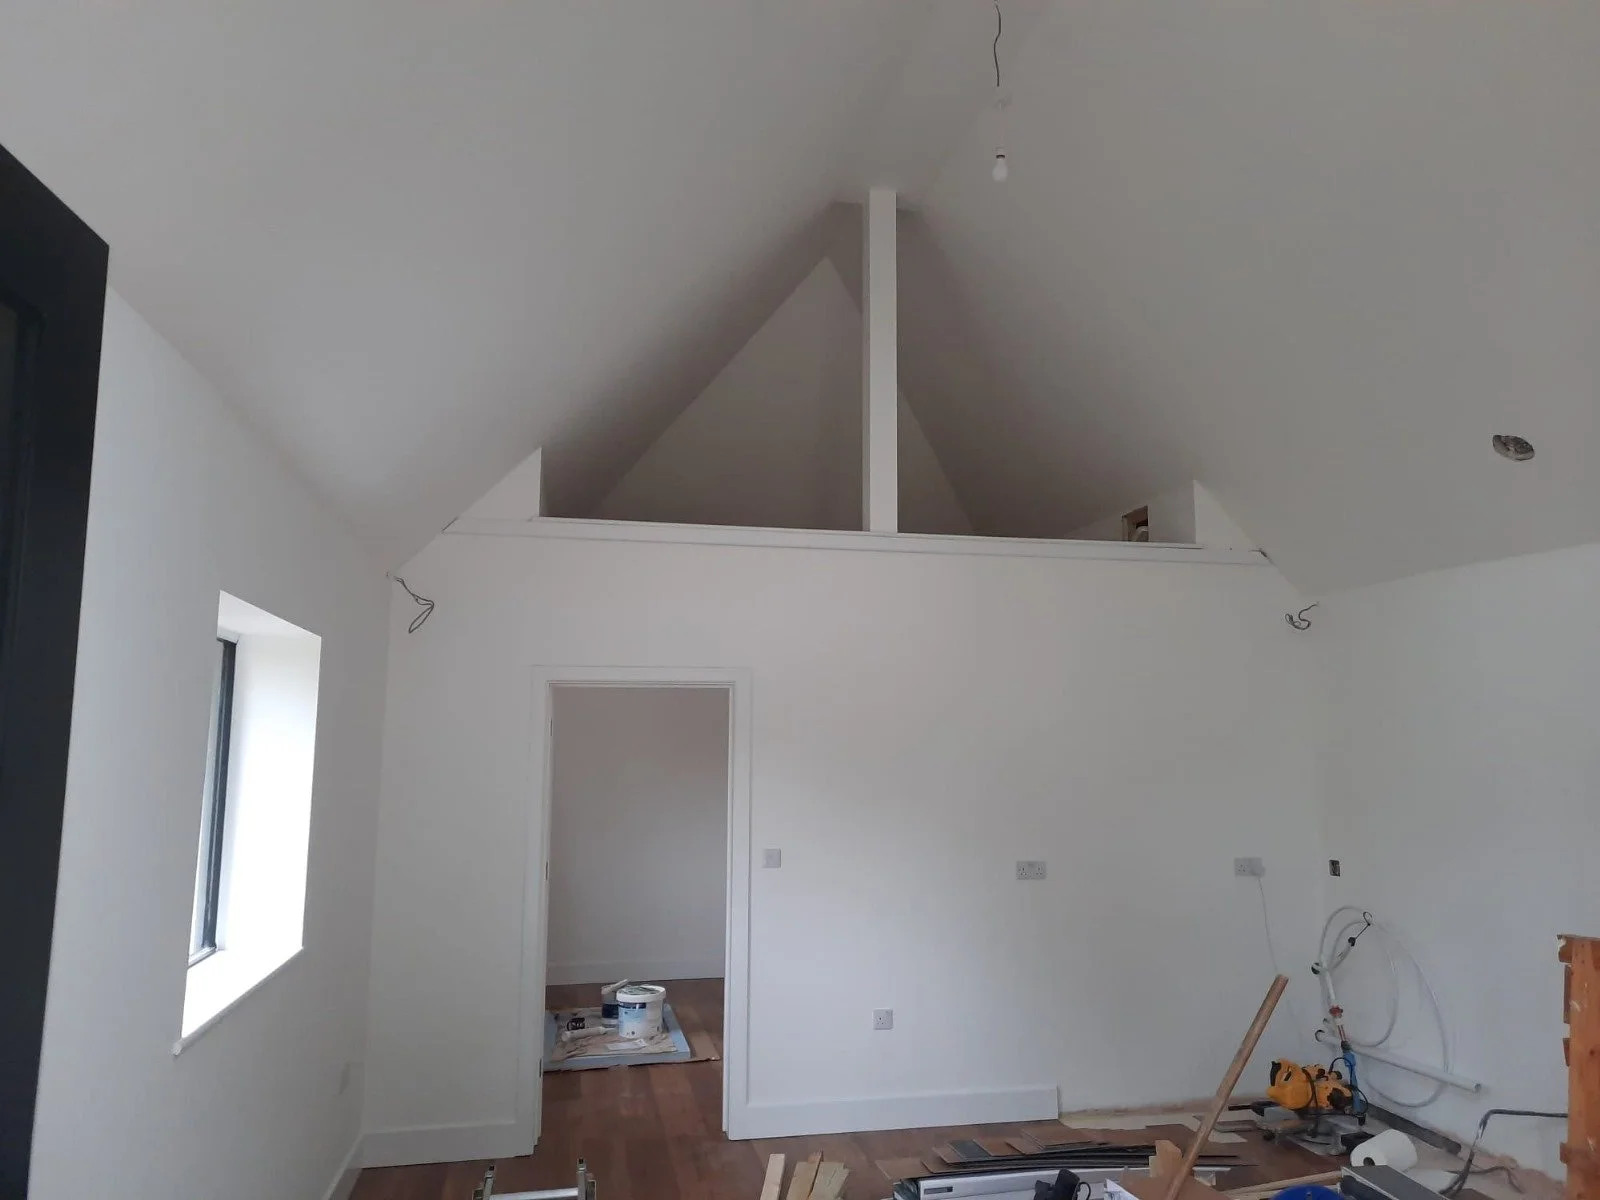
Finishing touches
Internal finishes like painting, skirting, and architraves play a crucial role in refining and completing the look of a space while also protecting structural elements. Painting walls and ceilings not only adds color and personality but also enhances durability by protecting surfaces from wear and moisture. Skirting boards provide a polished transition between walls and floors, protecting walls from scuffs and damage caused by furniture or cleaning. Similarly, architraves frame doors and windows, adding decorative detail while covering gaps between plaster and joinery. Careful preparation, including sanding, priming, and choosing appropriate materials, ensures a smooth and professional finish. Together, these elements elevate the aesthetic of a space, creating a cohesive, polished, and functional interior design.
-
![]()
Outside touches
Doors and windows play a vital role in letting natural light into a building, enhancing its ambiance, functionality, and energy efficiency. Well-placed windows maximize daylight, reducing the need for artificial lighting and creating a brighter, more inviting interior. Large windows or sliding glass doors can create seamless connections between indoor and outdoor spaces while framing beautiful views. Glass panels in doors or sidelights further enhance light penetration, especially in darker hallways or entryways. Choosing energy-efficient glazing ensures that natural light enters without compromising thermal insulation, helping to maintain a comfortable indoor environment. Strategically incorporating doors and windows not only improves the building's aesthetic but also promotes well-being by creating airy, uplifting spaces filled with natural light.
-
![]()
External rendering and landscaping are the final touches that enhance a building’s appearance, protect its structure, and create a welcoming outdoor environment. Rendering provides a smooth, durable finish to exterior walls, improving weather resistance and insulation while giving the property a modern, clean look. Various finishes, such as smooth, textured, or pebble-dashed render, allow for customization to suit different architectural styles. Landscaping complements the rendered exterior by shaping the outdoor space with elements like paving, lawns, planting beds, and decorative features. Well-planned landscaping not only boosts curb appeal but also improves drainage, defines pathways, and creates functional outdoor living areas. Together, external rendering and landscaping complete the build, adding value, protection, and aesthetic charm to the property.